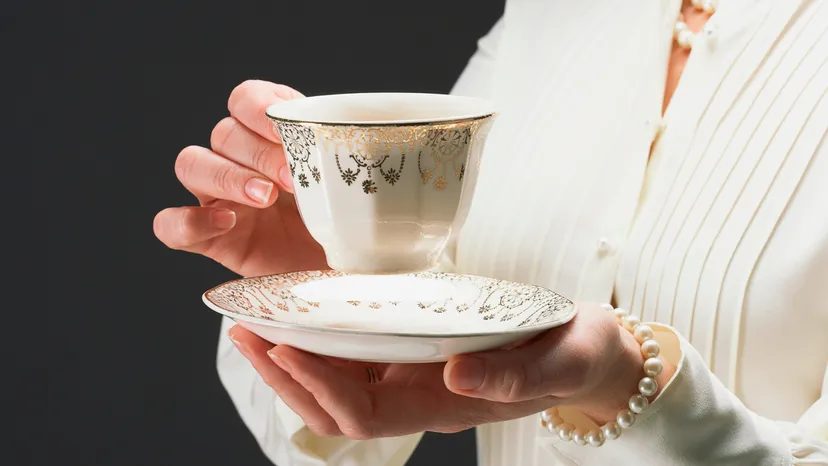
You are staring at a shelf full of options. Earthenware, stoneware, porcelain. The debate over bone china vs porcelain usually boils down to durability and price, but here is the thing most people miss: bone china is technically just a sub-type of porcelain. It is the premium end of that spectrum, sitting above basic porcelain and fine porcelain china.
Most well-appointed homes keep at least one set. Some keep a mix. Registering for a china pattern is one of the oldest customs for a bride and groom, but honestly, when you are eating, you care more about the food than the plate. Unless you stop to think about how the plate got there.
Bone china is stronger, more delicate, and has a translucent quality that basic porcelain cannot match.
Lenox is the only manufacturer of bone china in the United States. Their factory in Kinston, North Carolina, is where this process happens. The facility is massive. About 150,000 square feet (14,000 square meters). It houses 350 staff members and enough machinery to make the whole process look like heavy industry rather than artisan work.
Why bone china is different
The recipe changed in the late 18th century. An Englishman named Josiah Spode added calcined bone ash to the mix. That single addition created the material we know today. Spode still uses it. So does Lenox. And so do many other manufacturers.
The bone ash makes the material stronger. It also gives it that thin, translucent look. You can almost see light pass through the rim. Basic porcelain is opaque. Fine porcelain is better, but bone china is the gold standard for strength and appearance.
The four steps of china making
Making a plate is not just pouring clay into a mold. It involves four main processes:
- Clay making
- Mold making
- Glazing
- Decorating
These steps rely on four elements. You see them everywhere in the Lenox plant.
– Earth: The raw clay materials.
– Wind: Air hoses running through the facility.
– Fire: The kilns that fire the ware.
– Water: Used in every single step.
The next part of this breakdown focuses entirely on the first step: how the clay is actually made.
The raw material lift: how clay starts in the batch-house
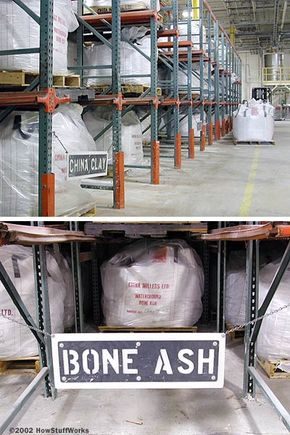
It starts heavy. Before it’s a sculpture, before it’s a mug, it’s a metric-ton bag of powder sitting on a pallet. In the batch-house, pulleys do the lifting. They grab those giant bags and hoist them up from the factory floor to a platform, roughly one story high.
Then they just wait.
The bags hang there, hovering over enormous hoppers. Gravity takes over. The contents empty out into the hoppers below, ready to be mixed into the slurry that will eventually become your pottery.

How the raw ingredients turn into Lenox’s final slip
The hopper feeds dry raw materials into a high-speed blunger. Water gets added here, creating a slurry. These slurries sit in massive tanks. Later, they get blended together to form the final mix and slip.
Five main dry ingredients go into that final mix:
- Bone ash (historically cow bone ash or other animal bones)
- China clay
- Ball clay
- Flint
- Feldspar
These raw materials are both domestic and imported products. For example, the feldspar used at this plant comes from North Carolina, while the bone ash comes from Holland and the United Kingdom.
Why Lenox uses two distinct clay colors
Lenox creates two colors of bone china. White china products comprise about 80 percent of total sales. Ivory-colored china makes up the remaining 20 percent.
Although certain additives or pigments are necessary to get the ivory color in the finished product, in the slurry state, both clays appear to be slightly gray. To differentiate the final mix for the ivory from that of the white, green vegetable dye is added to the ivory mix. The vegetable dye will eventually burn out in the kiln.
If the dye isn’t added, there’s no way to distinguish one clay from the other. It also helps to avoid getting the two clays mixed together.
How much reclaimed clay goes into every finished piece
During the clay stage, which is any time before glazing, all scrap clay that hasn’t been contaminated by debris can be reclaimed. Perhaps it was dropped on the floor and picked up some lint. In fact, every finished product here is made from 80 percent virgin clay and 20 percent reclaimed (scrap) clay.
How filter presses and extruders shape brick pugs
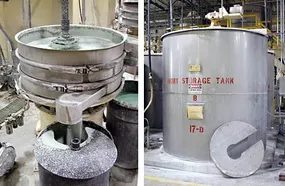
Once the batch is mixed, the slurry moves to a filter press. This machine strips out trapped air and excess water, dropping the moisture content to roughly 20 percent. The remaining wet material is called slip. It stays fluid for now.
The press outputs flat sheets of clay. Those sheets feed into an extruder. The extruder squeezes the material again, forcing out any last pockets of air. It reshapes the flat squares into long, continuous tubes. These tubes are known as pugs.
A single pug looks like a giant stick of chalk. Each one weighs just over 30 pounds (13.6 kg). They are dense, heavy, and ready for the next step.
How the pug stacker builds the pyramid
The machine doing this work is a pug stacker. It’s essentially a robotic arm. Its job is simple but repetitive: it grabs the clay pugs, moves them, and places them into a specific shape. You’ll see the result on a pallet. A pyramid. Not a flat pile. The pugs are stacked high, tapering as they go up.
Before the arm starts moving, the pallet is already covered. That covering is plastic sheeting. If you’ve ever used plastic wrap in your kitchen, this looks like that. Except it’s super-thick. Much heavier. More durable. You can see rolls of this material hanging on a wall nearby. They’re ready to go.
The process involves tearing pieces from those rolls. You take a section, lay it down, and prepare the base. The crucial part is the bottom edge. The plastic isn’t just draped over the top. It’s tucked firmly along the underside of the bottom row of pugs. Think of it as a protective tent. The goal is to maintain the humidity level inside that structure. The pugs need to stay moist as they cure. If they dry out too fast, they crack. The sheeting keeps the air trapped inside, creating a controlled environment around the stacked clay.
Drier pugs for cups
You might see a bag labeled “for cups only.” That’s not a marketing trick. The pug inside sits around 15 percent moisture, down from the standard 20 percent. Lower moisture means the material behaves differently in the mold. It’s denser, less plastic, and shrinks less during firing. That stability matters for thin-walled items like cups, where warping is a real risk.
How bone china molds are made
Once the raw materials are prepared, they need a shape. Molds do the heavy lifting. They turn raw pugs and slip into plates, bowls, pitchers, and the rest of the tableware lineup. The mold isn’t just a container. It defines the final form, the thickness, and the surface texture.
The process starts with a master model. A ceramicist or engineer carves the original piece, often in wood or plaster. That master is then used to create a mold, typically from a flexible material like rubber or polyurethane. The mold is built in sections, so it can be opened and closed without breaking the delicate, unfired greenware.
The mold is the soul of the piece. Get it wrong, and no amount of firing fixes the shape.
For complex shapes, like a pitcher with a spout or a plate with a detailed rim, the mold might have multiple parts. Each section is carefully aligned. When the pug or slip is pressed into the mold, air has to escape. Traps are built into the design to let that air out, preventing bubbles or hollow spots in the final piece.
Presidential plates from Lenox
While the molding process is standard, the finished pieces can carry heavy historical weight. Lenox, a major manufacturer, has produced official presidential china for five US presidents:
- Woodrow Wilson
- Franklin Delano Roosevelt
- Harry Truman
- Ronald Reagan
- Bill Clinton
These aren’t just decorative. They’re part of the White House dinner service, and their production requires the same precision as any other bone china piece, but with an extra layer of scrutiny. The design, the glaze, and the firing all have to meet specific standards. The molds for these pieces are likely more intricate, reflecting the detailed patterns and monograms that distinguish them from standard tableware.
How porcelain factories turn metal masters into plaster molds
Mold-making sits at the center of china production. The process relies on metal master molds and plaster to create the final production molds that shape every plate and bowl.
Think of a dinner plate mold. The metal master looks like two automobile hubcaps sandwiched together. One side forms the top, the other the bottom. They meet to define the exact curve and thickness of the finished piece.
Before any plaster goes in, prep work matters. Workers spray the inside of the metal masters with a soapy mixture. That thin residue isn’t for cleaning. It acts as a release agent, ensuring the wet plaster pulls away cleanly once it hardens. Without it, the mold would stick, ruining both the plaster and the surface finish of the next batch.
Once sprayed, the metal molds get lined up. They sit on three rows of tables. Each one rests on a disc-shaped piece of wood that spins like a lazy Susan. This setup isn’t decorative. It solves a practical problem during the pour.
Why two people pour plaster into china molds
The plaster doesn’t just get dumped in. Large bags are mixed with water until the consistency turns thick and creamy. This slurry gets funneled into a big mobile bucket that hangs from an overhead track.
Filling one mold takes two people.
One person handles the bucket, tilting it to start the flow. The other stands at the spinning wooden base, turning the metal master mold as the plaster pours. That rotation keeps the material distributed evenly across the entire surface. No pooling. No thin spots. Just a uniform shell forming against the metal.
Even distribution in the plaster stage dictates the structural integrity of every single piece that comes out of the kiln later.
It sounds simple, but timing matters. Plaster sets fast. If the pour slows down, you get seams. If the spin stops, you get uneven walls. The rhythm between the pourer and the spinner is what separates a usable production mold from a cracked, useless block of stone.
Why Plaster Beats Metal for Clay
You need to let that fresh plaster cure for roughly 20 minutes. Once it’s firm, grab a rubber mallet. Tap the outside of the metal frame gently. You are loosening the plaster production mold. Pull the two halves apart. The mold releases.
Do not rush this.
Next, pick up the air hose. Blast the plaster bits out of the metal forms. Sweep away any excess dust or particles. A worker at the nearby table inspects each mold. They stamp it with the current date. Why? Because tracking usage matters.
The factory churns out about 300 molds daily. You have two options for using them. Either you work with clay pugs, or you use slip. Let’s look at pug molding first.
Understanding Mold Lifespan
Plaster molds for standard dinner plates last for about 100 uses. Serving pieces and intricate porcelain items are different. Those molds only survive 10 to 15 uses before they fail.
Why not just keep using the original metal frames?
Metal cannot pull moisture. Plaster can. The plaster draws moisture out of the clay. That is the whole point. If you skip this, your pieces will not dry properly.
How the jiggering unit shapes clay pugs
The forming process kicks off at the jiggering unit. This facility runs two separate setups. One handles white china using gray pugs. The other manages ivory china with green pugs.
Once the pugs enter the line, they pass through a second extruder. This step squeezes out any trapped air bubbles remaining in the material. Consistency matters here. Air pockets ruin the final product.
Next, a large slicer cuts the continuous pug stream. It separates the clay into individual discs. These raw discs are the starting point for each plate.
Placing the disc onto the rotating plate mold
Operators position each clay disc on top of a plate mold. As soon as the disc sits down, the mold begins to spin. Above it, a jigger head starts rotating as well.
The jigger head lowers. It presses down firmly against the rotating slice and the mold plate simultaneously. This pressure shapes the clay into the desired form.
A scraping tool moves along the edge during this process. It trims away excess clay from the rim. The result is a “greenware” plate. It is still raw and unfired, but it holds its shape. The geometry is set. The finish will come later in the glazing and firing stages.
From wet slurry to bone-dry blanks
That excess clay doesn’t just sit there. It rides a conveyor belt straight into a recycle bin. There, it gets re-blended with water to form a slurry, which feeds back into the next batch of final mix. Waste is minimal. The loop is tight.
Next, the “greenware” plates hit a mold dryer. Once they exit the mold, they pass through a second dryer. The change is drastic. Moisture drops from 20 percent to just 0.5 percent. The clay is still soft, but it’s no longer sticky. It’s brittle enough to break if you drop it, but not yet hard enough to shatter easily.
Smoothing the edges before the fire
Before they go into the kiln, the plates get a final polish. A finishing machine runs them through damp sponges. These sponges smooth out the edges, removing any rough spots or uneven bits left by the molding process. It’s a quick pass, but it matters. Rough edges look amateur, and they can crack later if left jagged.
Workers inspect every single plate as it leaves the machine. No plate skips this check. If one looks off, it gets pulled.
Why setters are the unsung heroes
Here’s where most DIYers get it wrong. People assume you put the clay directly into the kiln shelf. You don’t. Not for plates.
The plates are placed on setters. These look like plaster molds, but they’re made of high-fire materials that can withstand the extreme heat of the kiln. The setters are then stacked on metal racks.
Why bother? Because at this stage, the plates are still malleable. They can bend. If you just laid them flat on a kiln shelf, the weight of the clay itself could cause sagging as it dries and heats up. The setter holds the shape. It provides structure. It ensures the plate comes out of the kiln looking exactly like it did on the workbench.
Think of the setter as a temporary skeleton. Without it, your nice curved rim might slump into a puddle of misshapen clay. With it, the form holds. The rack carries the stack through the kiln. The heat does its work. And the plate keeps its lines.
Does this seem like extra work? Maybe. But it’s the difference between a plate that looks like it was made in a factory and one that looks like it was thrown together in a garage.
How cup handles get attached in a ceramics plant
The jiggering unit spits out the basic cup shape. The clay hits the tooling at 15-percent moisture. That specific mix lets the material hold its form without crumbling. Once the jigger finishes the core, the cup moves to the profiling unit.
A carbide blade does the heavy lifting here. It carves the exact side profile and defines the foot ring. Precision matters. One wobble ruins the stack later.
Then it’s a manual step. Workers take each freshly profiled cup and attach the handle by hand. No automation for this part. They press the handle onto the designated spot.
Smoothing and preparing cups for the kiln
The finishing area looks like a wet workshop. Water sits in basins. Sponges are soaked. Workers use small finishing knives to smooth the lip. The foot gets the same treatment. They check the handle attachment one last time. If it feels loose, it gets redone.
The goal is uniformity. Every cup should look identical before it sees heat.
Once smooth, each cup sits on a small setter. These are called chums. The chums hold the cup upright. Workers stack the chums on racks. Those racks travel to the kiln.
Why separate machines are used for cups and plates
Cups, mugs, and small bowls all get their own molding machines. The mechanics differ from the plate line. The jiggering concept stays similar, but the tooling changes. The moisture level for cup pugs is fixed at 15 percent. Plates might run different. The carbide blade profile is specific to the vessel type. Handles are only added to cups and mugs. Bowls skip that step entirely.
The whole sequence moves fast. Mold, profile, attach, finish, stack. Each step relies on the previous one being right. If the profile is off, the finisher has to overwork the surface. If the handle is weak, it snaps in the kiln. The chum system keeps the fragile greenware stable until firing.
How slip casting works in bone china production
Molds are the skeleton of the process. Once the clay body is mixed into a slip, a liquid slurry, it gets poured into plaster molds. The plaster drinks the water from the slip, leaving behind a solid layer of china against the mold walls. That is the magic trick.
You cannot just dump the liquid in and walk away. Timing is everything. If you wait too long, the piece becomes too thick. If you pull it out too early, it collapses. Workers watch the mold, tap it, and feel for the right consistency. It is a tactile skill, not something a machine does well.
The station floor is busy. Multiple jobs happen at once. A worker might be trimming excess clay from one piece while preparing a new mold for the next batch. This is why cross-training matters so much here.
Why cross-training keeps the casting line moving
Every station has a lead. But everyone on that team can do the work. If the person pouring slip has the flu, someone else steps in. No line stops. No deadline slips.
For the workers themselves, switching tasks prevents burnout. Casting requires intense focus. You stare at surfaces, check for air bubbles, and feel the wet clay against your fingers. Your eyes get tired. Your back aches from standing. Then you switch to trimming. Now your hands are doing the heavy lifting, but your eyes rest. The rotation is built into the workflow, not added as a favor.
Cross-training isn’t just backup coverage. It is how the human body stays in the game.
What tools and materials matter at the casting station
You need clean plaster molds. Chipped or dirty molds produce defects. The slip must be at the right thickness, usually measured by time or density. If it is too thick, it pours poorly. If it is too thin, the piece is fragile.
Workers use rubber gloves, small brushes for smoothing, and sharp knives for trimming. Air is the enemy here. Trapped air creates bubbles inside the china. One bubble means a cracked cup later. So workers tap the mold gently, work the slip around edges, and inspect every surface before the piece sets.
How to spot casting problems before they become scrap
Look at the edges. A clean, sharp edge means the slip packed well. A fuzzy or uneven edge means the slip was too thin or the mold was dirty. Check the thickness. A well-cast piece feels uniform. A thick spot at the bottom means the worker left it too long.
If you are doing this in a small studio, the principles are the same. Use fresh plaster. Keep your slip consistent. And do not rush the drain time. Patience is cheaper than kiln failures.
Which roles rotate through the casting station
Typically, you see pourers, trimmers, and inspectors. The pourer handles the slip and the mold. The trimmer removes the excess clay and smooths the surface. The inspector checks for bubbles, cracks, or uneven thickness. In a small operation, one person might do all three. In a larger plant, the roles separate, but everyone still knows how to cover for each other.
This flexibility is what keeps the line alive. Not every day is easy. Some days the slip behaves, and some days it refuses to cooperate. Having more than one person who can handle the problem
Setting Up the Clay Filling Station
The casting area is a dedicated zone for precision work. An 18-inch diameter conference table anchors the space. On top, 18 lazy susans sit in a tight formation. Each disc holds a single casting mold, spaced to prevent overlap.
Three hoses drop from the ceiling. One delivers air. The other two supply liquid clay, or slip. One hose carries white slip. The second carries ivory slip. This setup lets you switch colors without dragging heavy buckets around.
You connect the hoses to the molds directly. The air hose helps clear air bubbles from the slip as it fills. The clay hoses feed the liquid directly into the mold cavity. This method reduces splashing and keeps the workspace cleaner than manual pouring.
Check your hose connections before starting. A loose fitting on the air line can cause uneven pressure. A kinked clay hose slows the flow and risks trapping air inside the mold. Inspect each connection point. Tighten the fittings. Make sure the valve handles are accessible from the table surface.
The air hose is not optional. It’s the difference between a solid cast and a riddled mess of trapped bubbles.
Once the hoses are in place, you can begin the filling process. Start with one mold. Open the valve for your chosen clay color. Let the slip flow in slowly. Watch the level rise. The air hose helps push trapped air out through the vent or overflow point.
When the mold is full, close the valve. Move to the next lazy susan. Repeat the process. This rhythm keeps the work steady. You’re not rushing. You’re not dawdling. Just a consistent, repeatable motion.
Practical Considerations for Slip Filling
Slip viscosity matters here. If the clay is too thick, it won’t flow evenly through the hose. If it’s too thin, it may leak through the mold seams. Aim for a cream-like consistency. Test it on your hand. It should coat your skin without dripping off immediately.
The lazy susans are there for a reason. They let you rotate the mold under the hose nozzle without moving the table or the hose itself. This saves time and reduces strain on your wrists. If you’re doing this daily, that small mechanical advantage adds up fast.
Keep a bucket of water nearby. If you accidentally spill slip, wipe it up before it dries. Dried clay is hard to scrape off the table surface and can damage the lazy susans’ rotation mechanism. A damp rag works best. Avoid soaking the wooden table if it’s untreated.
The air hose also helps with cleanup. A short burst of air through the hose clears residual slip from the line. Do this at the end of a session to prevent clogs. A clogged hose is a headache you don’t need the next morning.
Safety and Maintenance Notes
Clay slip contains fine particles. Wear a dust mask if you’re mixing or handling dry powder nearby. The wet slip itself isn’t a major inhalation risk, but dried dust is. Keep the mixing area ventilated.
Check the hoses for cracks or wear monthly. A small tear can cause a sudden leak of slip onto the floor. That’s a slip hazard, literally. Inspect the joints, especially where the hose meets the ceiling fixture and where it connects to the mold filling port.
The 18 molds on one table is
Firing the Greenware: From Raw Clay to Whiteware
Once the slip has done its job, the mold comes apart. You pop off those big red bands, then pull the four mold sections away from the piece inside. It’s delicate work. One tug too hard and you’ve got a crack.
Now you’re holding a greenware piece. That’s the term for unfired clay. Don’t let the word “green” fool you. It doesn’t mean the object is green-colored. It just means it’s raw, unfired, and fragile. Once it goes through the kiln, it becomes whiteware.
Before it hits the kiln, there’s cleanup. Because the mold was made of multiple sections, you’ll see seams on the surface where the parts joined. Workers grab damp sponges and small finishing knives. They smooth out those lines. No seam marks allowed.
Why Does Bone China Shrink in the Kiln?
You might wonder why the size changes so much. It’s not a mistake. It’s physics. As the kiln heats up, the bone ash and clay react. The material densifies.
Here’s the math for a standard plate:
– A 12-inch (30.5-cm) greenware plate starts out large.
– After firing, it shrinks to 10 inches (25.4 cm).
That’s a two-inch loss. If you’re casting your own pieces at home, plan for that. Make your mold slightly bigger than your final target size.
The Scale of Industrial Production
If you’re doing this in a garage, you’ll never match the Kinston plant. That facility chews through about 4 million pounds (1.8 million kg) of clay every year. Every single day, they turn out 15,000 to 20,000 pieces of china.
How fast is the whole process? From raw dust to finished dish, it takes three to four days. That’s quick for ceramics. The kiln cycle, glazing, and quality checks all happen in that window.
One last thing: Lenox now makes gilded china that’s microwave-safe. Gold on a plate used to mean “keep it in the cupboard.” Now you can zap it with breakfast. Not bad for a material that’s been around for centuries.
Moving Greenware Through the 135-Foot Bisque Kiln
The kiln is a beast. 135 feet long. Gas-fired. It doesn’t wait.
Once greenware is stacked on metal racks, it sits in transportation lanes. Holding areas, really. Then the conveyor belt takes over. The racks roll through.
Ninth-hour cycles. That’s the clock. Each piece gets exactly 9 hours in the fire. No more, no less. The temperature hits 2,290 degrees Fahrenheit (1,254 C).
Why that length? Why that time? Because the kiln is moving. It’s a continuous flow. The racks enter one end, travel the 135-foot length, and exit the other. The 9-hour mark aligns with that transit time.
The gas burns. The heat soaks into the clay. The water is gone. The organic matter is burned out. The piece is now bisqueware. Ready for glaze.
Why 9 Hours in a 135-Foot Kiln?
The math is simple. Distance over time. 135 feet divided by 9 hours gives you the conveyor speed. The kiln is designed so that the dwell time matches the firing requirement.
If you want to DIY a small kiln, you won’t use a conveyor. You’ll load, fire, cool, unload. Batch processing. But the principle holds. Time and temperature are paired. You need specific heat for a specific duration to transform the clay.
The gas kiln here is industrial scale. You aren’t building one in your garage. But the logic is the same. Monitor the ramp. Hold the peak. Cool down.
What Happens at 2,290°F?
At 1,254 C, the clay is vitrifying at the surface but not fully. Bisque firing isn’t about making glass. It’s about making the clay porous enough to drink glaze, but hard enough to handle.
The organic matter is gone. Any carbon from the clay or the slip is oxidized. The water is fully expelled. The clay structure is stabilized.
If you’re glazing your own pieces, you need this step. You can’t put glaze on greenware. It cracks. It explodes. You need bisque.
The temperature is high, but not glaze-firing high. Glaze fires often go higher, sometimes 2,200 to 2,300°F depending on the glaze. But bisque is the foundation.
Safety and Handling
The kiln is hot. The racks are hot. The air is hot. Never touch the racks until they cool. Use heat-resistant gloves. Check the conveyor path for obstructions.
If you’re working in a studio, ensure ventilation. Gas kilns produce combustion byproducts. Carbon monoxide is a risk. Get a CO detector. Vent the workspace.
The conveyor belt is mechanical. Moving parts. Pinch points. Keep hands clear.
The Next Step
Out of the kiln, the bisqueware is cool. It’s brittle. Handle with care. It’s ready for the glaze dipping or spraying station. The clay now absorbs the glaze. The next fire will melt that glaze onto the surface.
The
Vibratory Finishing: How the Surface Gets Smooth
That high-frequency buzz is the vibratory finish.
Kiln-whiteware comes out rough. It feels like very fine-grained sand paper under your thumb. The glaze hasn’t fully fused; the surface is still porous and textured.
You don’t polish it by hand. Not anymore.
Instead, the pieces go into a bath. Water. Smooth stones.
The stones tumble against the china. The vibration knocks away that gritty exterior. It’s aggressive, but controlled.
The vibration of the stones smoothes away the rough exterior.
This is where the “china” feel actually begins. Before this step, it’s just fired ceramic. After, it’s ready for handling.
The stones act like a natural abrasive. They’re smooth enough to avoid deep scratches but hard enough to break down the silica skin left by the firing.
Water keeps the dust down. It also helps the stones slide, preventing jamming.
If you’re replicating this for small batches, you need a sealed container that can withstand continuous vibration. Standard plastic tubs will crack. Use something rated for industrial agitation, or a dedicated ultrasonic-style tank modified for mechanical tumbling.
The stones matter. River rocks work. Steel media works. Ceramic balls work. Just make sure they’re rounded. Angular pieces will etch the surface.
Time is variable. Thin plates finish fast. Thick mugs take longer. Watch the surface. Once it stops feeling like sand paper, pull it out.
Rinse thoroughly. Residual stone dust will cloud the glaze if you don’t wash it off.
It’s a dirty job. You will get grit on your hands, in your shoes, on the floor. Wear gloves. Eye protection if the water splashes.
This step is non-negotiable for a professional finish. Skip it, and your “porcelain” will feel like pottery. And nobody wants that.
Industrial washing and quality inspection
Stone bath residue gets stripped off. The process involves a giant industrial dishwasher followed by a dryer. This is where you check for damage. Close inspection happens at the other end.
If a piece has a crack or chip, it does not move forward. Only items that pass muster continue. The next stage is glazing. You need to catch flaws now. Fixing them later costs money and time.
Preparing for the glazing line
Whiteware moves to the next station once it is clean and dry. The team looks for structural issues. Hairline fractures show up under good light.
“Pieces that pass muster move on to the glazing process.”
This step separates good stock from scrap. You want every piece ready for the next coat. No shortcuts. The glaze will not hide a broken rim.
The Glaze: Liquid Glass That Locks In Durability
The glaze is where the real magic happens. It starts as a slurry, basically liquid glass, and gets applied to the raw ceramic body. When that hits the kiln, it melts, flows, and hardens into a shell so tough it can shrug off daily wear and tear.
Lenox has a specific method for this. You can actually watch the process if you look at their factory footage. It’s not just dipping. The pieces go through a series of stages that ensure the coating is even. No thin spots. No runs. Just a consistent barrier.
This layer does more than look shiny. It seals the surface. It makes the piece non-porous, which means no more water absorption. And because it’s so dense, it resists scratches and chips far better than unglazed clay ever could.
Why Bone Ash Changes the Equation
Back to the Wedgewood teacups holding up a Lola race car. That wasn’t a fluke. It was material science in action.
Bone ash is the ingredient that separates bone china from standard porcelain. It’s made from burnt animal bones, usually cattle, and it adds a level of translucency and strength that regular kaolin clay can’t match.
- Higher density: The bone ash particles pack tightly, creating a harder matrix.
- Thermal stability: It handles sudden temperature changes without cracking as easily.
- Weight reduction: It’s lighter than standard porcelain but hits harder when dropped.
So when people say “china is fragile,” they’re usually thinking of the wrong stuff. They’re confusing earthenware or cheap stoneware with high-end bone china. There’s a massive difference in the molecular structure.
Testing the Limits: The Race Car Stunt
A department store in Canada wanted to prove this point to a skeptical public. They didn’t just drop plates. They put a Lola race car on four Wedgewood teacups.
Think about the pressure involved. That car is heavy. The cups are small. The contact points are minimal. And yet, they held.
This isn’t about making dinnerware for racing. It’s about demonstrating tensile strength. The glaze and the bone ash core worked together to distribute that weight. If the material were weaker, the cups would have shattered instantly. Instead, they stood firm.
“China is actually a lot stronger than you would think.”
That’s the key takeaway. It’s not about invincibility. It’s about understanding the material. You still don’t want to run your dishwasher on the wrong cycle. You still want to handle it with care. But knowing it’s built to take a beating changes how you think about it.
Practical Takeaways for Your Home
If you’re buying new pieces or caring for old ones, here’s what matters:
- Check the label. Look for “bone china.” If it just says “porcelain,” it might lack that extra strength layer.
- Inspect the glaze. Run your finger over the edge. It should feel smooth, not rough or pitted. A bad glaze job leads to early failure.
- Avoid thermal shock. Don’t put a hot dish straight from the oven into a cold sink. Even bone china has limits.
- **Stack properly
Why you have to pre-heat your ceramic pieces before glazing
Skip the warm-up step and your glaze will refuse to stick. It’s not just a preference; it’s physics. The clay surface needs to be hot enough for the glaze to bond properly. If the piece is cold, you’re looking at a messy, uneven finish that might even flake off later.
How industrial glazing booths work
Picture an automated car wash, but for dinner plates. That’s the closest analogy. Inside the booth, you’ll find roughly a dozen spray guns lined up. For a standard load of plates, eight of them are firing simultaneously. The goal is total coverage. No dry spots. No missed edges.
The plates sit on metal stands and move through a continuous stream of glaze. It looks like a conveyor system, but the substance flowing is silica-based slurry, not soap.
The role of the water wall
Facing the row of spray guns is a wall of flowing water. It looks like a series of small waterfalls. Why is it there? To catch overspray and keep the area clean. It prevents the glaze from settling on the floor or the machinery.
“The glaze is pumped from giant holding tanks to the glazing area.”
This setup ensures that the material stays wet and fluid until it hits the hot ceramic surface. The water wall acts as a barrier, keeping the environment controlled.
DIY tips for replicating this process at home
You won’t have a dozen spray guns. You won’t have a water wall. But you can mimic the core principles.
- Pre-heat is non-negotiable. Bisqueware must be at the right temperature.
- Even coverage matters. If you are dipping, do it in a single, steady motion. If you are spraying, overlap your passes.
- Control your environment. Use a drop cloth or a large container to catch excess glaze. Clean as you go.
The industrial method is about consistency. Your home setup is about intent. You have to make every move deliberate. One missed spot ruins the whole piece.
Which tools do you need to start?
For a beginner, a simple dip bucket or a handheld spray gun is enough. You need a sturdy stand to hold the piece while you work. Gloves are a must. Glaze slurry is messy and can be abrasive.
The tanks in the factory are giant, but your bucket is your tank. Stir it well before you start. Glaze separates over time. The silica settles to the bottom. If you don’t mix it, you’ll get a thin, patchy coat.
How does this compare to hand-painting glaze?
Hand-painting gives you control over thickness and placement. Spraying or dipping gives you speed and uniformity. For a set of matching plates, spraying or dipping is faster. For a single, artistic piece, hand-painting allows for more variation.
The key difference is the surface temperature. Whether you spray or pour, the piece must be pre-heated. The glaze needs that thermal energy to fuse.
Why does the glaze adhere better when hot?
It’s about molecular bonding. The glaze melts slightly on the surface of the hot ceramic, creating a chemical bond with the clay. Cold clay doesn’t offer that same reaction. The glaze
How waterfall systems reclaim glaze mist
The waterfalls here do double duty. They act as a filter for the glaze mist drifting out of the application booth. That mist is the stuff that didn’t adhere to the clay. It hangs in the air, invisible until it hits the water.
Gravity does the rest. Glaze is denser than water. It sinks.
Let the tank sit for a bit. The sludge settles at the bottom. You scoop it out. You filter it. You put it back in the glazing tank. No waste. Just a loop.
Why you wipe the foot before the kiln fire
Before any piece of china goes into the gloss kiln, you check the bottom. The foot. If it’s dirty, it sticks.
The kiln is 185 feet long. That is a massive tunnel. If a plate fuses to the kiln shelf, you aren’t just losing one plate. You’re damaging the kiln lining. You’re stopping the whole line.
Grab a damp sponge. Wipe the foot clean. Dry it. Then load it.
The damp sponge works because it lifts the dust and grit that act like glue. It’s a two-second job. Skipping it costs you far more than two seconds.
Why the gloss kiln fires for eight and a half hours
Total burn time sits at 8.5 hours at 2,020 degrees F (1,104 C). The fuel mix is hybrid. Gas handles the heavy lifting for heat. Electricity takes over where gas struggles: consistency.
Standard kiln curves break into three blocks. Ramp-up. Soak. Cool-down. The gloss schedule follows that logic but with specific timing.
- Ramp-up: ~3 hours
- Soak: 2.5 hours
- Cool-down: ~3 hours
How electricity fixes glaze unevenness
Gas kilns get turbulent. During the hot-zone phase, flame fronts create hot spots and cold spots. For structural strength, that’s often fine. For a gloss finish, it’s a disaster. You need a uniform surface temperature so the glaze melts evenly.
That’s why the electric elements kick in during soak. They stabilize the atmosphere. No flame flicker. No aggressive convection. The result is a smooth, even glaze surface without the clouding you’d get from gas-only turbulence.
Which power source drives each stage
You don’t need to manage the switch manually if your controller is set right, but understanding the split helps troubleshooting.
- Gas: Primary heat source during the initial ramp. It gets the mass up quickly.
- Electricity: Primary stabilizer during the 2.5-hour soak. It holds the temperature steady without the fluctuation of gas jets.
- Cool-down: Usually unpowered. Controlled by venting and ambient heat loss.
Why the 2.5-hour soak matters
You might ask why soak is so long for a gloss effect. It isn’t just about time. It’s about thermal equilibrium. The glaze needs to flow and level out. If the kiln is still fighting to maintain heat with gas jets, the glaze traps bubbles and uneven thickness. Electric heating during that window allows the surface tension to do its job without interference.
If your gloss looks pitted or orange-peeled, check your soak duration and power source. Did the gas stay on too long? Did the electric elements engage late? The 2,020 F peak is non-negotiable for this specific glaze chemistry, but the stability at that peak is what defines the finish.
Trimming the Foot and Prepping for Decoration
Before anything else happens, the pieces get another look. If the foot ring feels rough or has uneven spots, it goes under a diamond wheel. That grinding process smooths out any sharp edges.
Once the surface is clean and even, the whiteware moves to a holding area. It sits there, waiting. No decoration happens yet. The porcelain is just… waiting.
Energy Costs at the Kinston, NC Plant
The Lenox facility in Kinston, North Carolina, burns through a lot of power. We’re talking $1.5 million a year. That covers gas and electricity. Kilns, dryers, and all the machinery drawing from the grid add up fast.
It’s a heavy operational cost, but necessary to keep the firing cycles running consistently.
How Lenox Applies Decals and Metals to China
Decorating the final piece is where the hours pile up. You’re looking at roughly 85 different patterns and around 400 distinct shapes, which makes the process slow and repetitive. Some steps need a steady human hand; others rely entirely on machinery. It’s a tedious grind, but it’s where the design actually lands on the surface.
Three main materials get applied to the china during this phase. You’re working with decals, precious metals (gold, platinum, or a mix of both), and enamel.
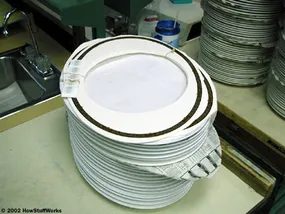
If you’re handling a decal by hand, say on a dinner plate, there’s a specific trick. You draw a thin blue line around the rim first. That line acts as your alignment guide for the decal. Don’t worry about that blue ink staying. It burns away in the kiln, so it’s invisible in the final product.
Here is the mechanical process for a hand-applied decal:
- Soak the decal in water until it’s slippery.
- Place it on the plate by hand.
- Use a slightly damp sponge to smooth the paper onto the surface, pushing out air bubbles.
Once that’s done, you flip the plate over. The Lenox back-stamp, which is actually a gold decal itself, gets applied to the bottom.
Now the real work happens. The pigments and any metal traces have to fuse into the whiteware body. That requires a kiln running at 1,600 degrees Fahrenheit (871 C). The piece sits in there for about two and a half hours. That heat is what seals the design permanently into the glass-like surface of the china. Without that specific temperature and duration, the decal would just sit on top, ready to chip off.
How gold and platinum gilding bonds to porcelain
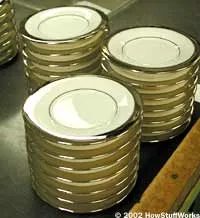
Applying precious metal to whiteware is technically called gilding. It follows the same broad logic as decal application, but the materials behave differently. You can apply the metal by hand or machine, depending on the piece.
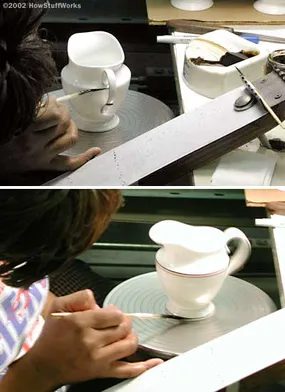
Small items like creamers or cups demand a human touch. The metal is in a liquid state when it goes on, so you paint it with a delicate brush. Precision matters here. A machine would just smear the thin rim or obscure the shape.
For dinner plates or platters with wide rims, a machine handles the job. Consistency beats nuance when you’re edging large surface areas.
The real magic happens in the kiln.
Whether you painted that gold line by hand or a machine stamped it, the metal doesn’t stick until it’s fired. The kiln hits 1,400 degrees F (760 C). It stays there for about one and a half hours. That heat permanently fuses the metal to the china. Without that firing cycle, the gilding is just paint.
How enamel creates an embossed look on dinnerware
Enamel works differently than gilding. When you apply enamel, the design ends up looking embossed on the plate. It has physical depth.
You can apply enamel by hand or with a machine. The machine approach stamps the entire design onto the china in one go. This is faster and more uniform, but the hand-application option still exists for specific aesthetic needs. The result is a tactile surface, not just a flat image.
The distinction matters: gilding adds a metallic layer that fuses via heat; enamel adds a raised, glazed design that physically alters the surface texture.
Which method should you choose for home renovation projects?
If you’re thinking about replicating these techniques on a DIY scale, understand the threshold. You can’t do 1,400-degree kiln firing in a home oven. That’s industrial equipment.
However, if you’re sourcing vintage or handmade whiteware for your kitchen renovation, knowing how gilding and enamel are applied helps you care for the pieces. Hand-painted gold requires gentle cleaning. The embossed enamel surface can trap food particles in its crevices, so scrubbing matters more than on glazed-only pieces.
Machine-applied designs on large platters tend to be more durable. The stamped enamel has a uniform thickness. Hand-painted gilding on cups is more fragile. Treat those with soft cloths and mild soap.
The material choice determines the maintenance. Gold and platinum are durable metals once fired. Enamel is glass-like. Both are permanent, but their vulnerability points are different.
You don’t need to know how to gild a cup to appreciate why that vintage creamer costs what it does. But knowing the process explains why a “hand-painted” tag commands a premium. It’s not just marketing. It’s the brushwork. It’s the human control over liquid metal. It’s the risk of a smudge that never gets fixed.
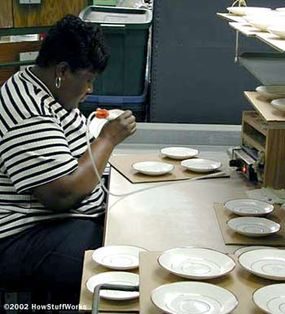
The Hidden Difficulty of Hand-Placing Enamel Dots
You’d think putting enamel on a plate is easy. Sort of like piping buttercream. Just squeeze, release, move on.
It isn’t.
That “simple” look hides a brutal level of precision. You need a steady hand that barely trembles and patience that borders on masochism. Look at that specific plate design. Count them. Close to 400 individual dots of enamel.
Each one has to land exactly where the pattern dictates. One slip and the whole aesthetic falls apart. You aren’t just applying color; you are executing hundreds of micro-movements in a single session.
The tools matter here. A fine-tip applicator is non-negotiable. Standard brushes won’t cut it. You need something that can control the flow of glass powder or paste with surgical accuracy.
Why Hand-Application Beats Machine Stamping
Machines are fast. They don’t get tired. But they lack nuance.
Hand-work lets you adjust for surface texture, slight curvature, or the specific way the enamel flows on that particular piece of glass. When you’re doing 400 dots, consistency is hard to maintain manually, but it’s where the character of the piece lives.
“The work requires patience and a very steady hand.”
That’s the whole game. You are the machine. Your muscle memory is the stamping press.
Practical Tips for Maintaining Steady Hands
- Work in batches. Don’t try to do all 400 dots in one sitting. Your hand will cramp.
- Use a stable support. A ring or a padded surface helps keep the plate from micro-shifting under your brush.
- Check your tension. If you’re gripping the tool too tight, you lose dexterity. Relax the wrist.
- Lighting matters. You need bright, even light to see the edge of each dot and ensure it doesn’t bleed into the next space.
The Physical Toll of Precision Work
It’s not just mental focus. It’s physical. Your stabilizing hand has to hold the piece steady while the working hand performs tiny, repetitive motions.
After 100 dots, your fingers might start to ache. After 200, you might start rushing. That’s when quality drops.
Slow down. Breathe out as you place each dot. The rhythm helps keep the hand from shaking.
Comparing Hand-Placed vs. Applied Enamel Finishes
| Feature | Hand-Placed | Machine/Stamp |
|---|---|---|
| Speed | Slow | Fast |
| Consistency | Variable (human) | High (mechanical) |
| Detail Control | High (can adapt) | Low (fixed pattern) |
| Skill Requirement | High | Low |
| Cost | Higher (labor) | Lower (efficiency) |
If you’re doing this for a one-off piece or a custom commission, the hand-work is where the value sits. For mass production, it’s a different calculation.
Common Mistakes When Doing Dot Work
- Overshooting. Applying too much enamel at once. It dries unevenly and looks blobby.
- **
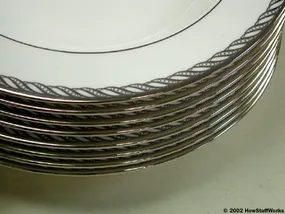
How the enamel decal transfer machine works
Watching the decal application line at the Lenox plant feels like peeking into a well-oiled industrial engine. The machinery is fascinating, mostly because it is trapped inside a glass enclosure. That safety barrier makes getting a clear photograph of the moving parts nearly impossible, but the process itself is straightforward once you see it happen.
The cycle starts with heat. The decal, sitting on a surface with a waxy residue, gets warmed up. This softens the material, preparing it for the transfer. Then, the big piece of the puzzle moves in.
Think of a giant, red, rubber kickball. Now make one side of it cone-shaped. That is essentially what the silicone rubber “bomb” looks like. It is massive and squishy. The machine presses this bomb down onto the heated decal.
The lifting motion is the key. As the rubber bomb rises, it grabs the decal with it. The waxy residue helps the decal stick to the silicone surface rather than falling back onto the original sheet.
Then comes the flip. The bomb, now carrying the decal, moves over to the ceramic plate. The machine squashes the bomb against the plate’s surface. The heat and pressure transfer the design from the rubber to the enamel. The bomb lifts away, leaving the pattern behind. It is a simple push-pull mechanism, but the precision required to handle delicate ceramic without shattering the plate is impressive. The whole process is less about force and more about controlled, gentle pressure.
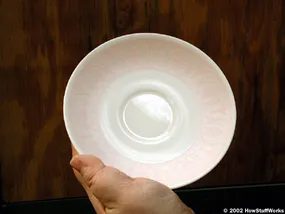
Why the 1,400-Degree Kiln Step Is Non-Negotiable for Durable Enamel
You just laid down the decorative enamel. Now, it’s raw. Soft. Vulnerable. That finish won’t stick, won’t survive a dishwasher, and won’t look right until it hits a kiln. The temperature hits 1,400 degrees. The timer runs for about one and a half hours. That’s the commitment. No shortcuts here. If you’re doing this at a hobby scale, you need a kiln that actually reaches that temp and holds it. Ceramic enamel isn’t paint. It’s glass that melts into the clay body. Skip the firing, and your piece is just decoration on a fragile shell.
How Final Inspection Works Before Packaging
The kiln cools. The china comes out. It looks like the final product now. But it’s not done. Not yet.
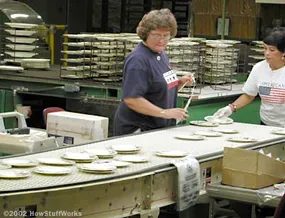
These pieces move out of the decorating zone. They go to a station for one last look. This is where defects get caught. A tiny chip. A smudge that survived the firing. A color patch that didn’t blend right. This is the gate. If a piece passes, it gets tagged. A barcode goes on it. This tracks the item from here to the customer’s hands.
Wrapping and Boxing: The Last Line of Defense
Passed pieces get wrapped. Thick foam goes around them. Then, a bag. This isn’t just padding. It’s shock absorption. Then they head to the boxing area. Boxes get packed. Taped. Labeled. Ready for the shipping dock.
“China that passes muster will be bar-coded, wrapped in foam and bagged.”
This step is where most damage happens if you cut corners. Cheap cardboard, thin paper, no foam. The package hits a truck, gets tossed, and your $50 plate arrives in three pieces. The foam isn’t optional. The bag isn’t optional. The boxing area is a specific station, not just a table in the corner. This is the last time anyone touches the item before it leaves the facility.
Where to Start Your Own Packaging Setup
If you’re producing small batches, you need this workflow. You don’t need a massive boxing room. But you need:
- A kiln that hits 1,400°F and holds it for 90 minutes.
- A dedicated inspection station. Good light. A clear surface to lay the piece flat.
- High-density foam packaging. Not the thin, flaky kind.
- Sturdy corrugated boxes. Double-wall if you’re shipping long distances.
- A labeling system. Barcodes are ideal, but clear, permanent markers work for small operations.
The move from decorating to packaging is a physical handoff. The china leaves the artistic zone and enters the logistics zone. That shift is critical. If you mix them, you’ll forget to inspect. You’ll skip the foam. You’ll box it up and send it out, hoping for the best. Don’t hope. Inspect. Wrap. Box. Ship.
What Happens When a Plate Isn’t Perfect
You just bought a set of plates. One has a hairline crack. Or maybe the gilding is chipped near the rim. It isn’t flawless.
What happens to that piece?
Three things can happen.
- It gets destroyed. Shattered and swept up.
- It becomes a “second.” It goes to an outlet store for less.
- It gets fixed. If the flaw is small, like a missing patch of gold leaf, they repair it. Then it goes back through final inspection.
If you are holding a plate right now that feels a little off, that is why.
How to Keep Your Porcelain from Chipping
Manufacturers make china to be used. Daily. They want you to eat off it. But you have to treat it right.
Lenox has some good rules.
- Skip the abrasives. No steel wool. No heavy-duty scrubbers. Those are for pots and pans. Use mild detergent and a soft cloth.
- Protect the basin. If you hand wash, put a towel or rubber mat on the bottom of the sink. Use a soft sponge.
- Dishwasher? Be careful. You can use one. Just pick the regular or gentle cycle. Avoid the “pots and pans” cycle. It is too harsh.
- Load with space. Don’t let pieces bump into each other. Crowding causes chips.
- Let it cool. Wait until the china is cool before you unload it. Thermal shock cracks plates.
Stacking Without Scars
You have to stack them. There is no room in the cabinet for a single layer.
Use felt pads. Napkins work. Even coffee filters do the job. Put them between the plates. This stops the foot of one plate from grinding against the top of the next.
It is a small habit. It saves your set.
Why Bone China Is Different
You might wonder why some plates are called “bone china” and others are just “porcelain.” It goes back to how they are made.
Soft-paste porcelain was an early European attempt to copy the hard-paste china coming out of East Asia. It was artificial. They mixed white clay with ground glass, called “frit,” and ash from cow bones. Sometimes soapstone. They fired it at lower temperatures. It was expensive. It was tedious. And it cracked easily.
Hard-paste china, the original, came from China. They fired it at higher temperatures. That heat makes it stronger. It can handle boiling water without breaking. The main ingredients are kaolin clay and petuntse, also known as china stone.
The difference matters. One is a fragile experiment. The other is a durable material.
Where to Find More on Ceramics
If you want to dig deeper, look for specific guides.
- Glossary of Ceramics Terms from Lenox.
- Old China Patterns Limited. They handle discontinued patterns. You need to replace a single piece from a 1990s set? Check there.
Understanding the material helps you decide what to buy. And how to keep it.