
The dishwasher is often the outlier in a beautifully coordinated kitchen. You have the custom cabinets. The tile floor ties the room together. Then there it sits, right in the middle of the workflow, screaming for attention. It breaks the line. It ruins the flow.
But you don’t have to live with that visual interruption.
Whether you are dealing with a semi-integrated model with controls on the outside or a fully integrated unit with hidden buttons, there are ways to make the appliance disappear. The goal is simple: integrate it into the décor so it feels like part of the cabinetry rather than an intrusion.
Here are effective methods to blend your dishwasher into the background.
Appliance Paint
This is the cheapest route to camouflage your unit, but it comes with a catch. It is tricky. If you rush it, you will end up with a finish that looks amateurish and draws even more attention to the spot.
The secret lies in preparation. You must start with a primer designed to bond with the existing surface. Without that sticky foundation, the paint will peel, chip, or look patchy within months. Once the primer sets, you get a smooth canvas.
Appliance paint comes in a spectrum of colors. You can match your cabinets exactly or go for a stainless steel finish to blend with other high-end appliances. It requires patience, but the payoff is a seamless look.
Dishwashers are actually more eco-friendly than hand washing. An Energy Star model saves roughly 5,000 gallons of water per year.
Stock Panel
If painting feels too risky, a stock panel is a safer, low-cost alternative. These are readymade covers designed to fit specific dishwasher door sizes.
They come in standard dimensions that cover a wide array of models. Colors include white, black, almond, bisque, and stainless steel. It is an easy fix to visually upgrade a budget-friendly dishwasher without tearing it out.
The installation is straightforward. You attach the panel to the existing door using the manufacturer’s hardware. It doesn’t require carpentry skills. It just requires a drill and some patience.
An Energy Star dishwasher uses about 4 gallons per cycle. A standard model uses closer to 6 gallons.
Behind Existing Cabinets
Moving the appliance entirely out of sight is the ultimate integration strategy. This approach involves reconfiguring the cabinetry to tuck the dishwasher behind another element.
This might mean placing it behind a pantry door, inside a large storage cabinet, or under a counter that doesn’t see much traffic. It requires planning the layout before installation. You need to ensure the plumbing and electrical connections can reach the new location.
It is not just about hiding the machine. It is about preserving the kitchen’s aesthetic lines. When the dishwasher is behind a cabinet door, the visual noise disappears. The room feels larger. The flow returns.
This method works best during a renovation. Retrofitting it into an existing setup can be complex and expensive. But for those willing to do the legwork, it offers the cleanest possible result.
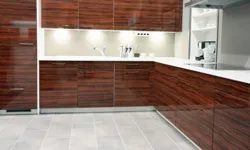
If you’re lucky, your new appliance fits perfectly under the counter and behind existing cabinets. No fancy framing required. The catch? The dimensions must align. Standard sizes don’t always match older kitchen layouts. This works best when you replace cabinets and dishwasher at the same time. You pick models that speak the same design language. Mismatched specs mean gaps. Gaps look unfinished.
DIY Paneling Solutions
Stock panels rarely match your specific wood grain or style. So you make your own. Use cabinet doors that coordinate with your existing kitchen. Attach them to the dishwasher front. It’s a custom look for a fraction of the cost.
This isn’t for everyone. You need carpentry skills. Gaps around the door edges need filling. You’ll need coordinating woodwork to hide the seams. If you lack the steady hand or the jigsaw, hire a local handyman. Cabinetmakers often take this on. Shop around for rates. You can probably find a good deal on labor if you supply the materials.
Rinsing dishes before loading uses up to 20 gallons of extra water. Scrape first. Load second. For dishes sitting a day or two, use the rinse cycle. It uses far less water than hand rinsing.
The Custom Cabinet Route
Custom cabinets are the most expensive option. But if you have the budget, they look the best. Ideal for high-end kitchens. A woodworker designs a solution that blends seamlessly with your existing joinery. Think about a single door styled to look like a pair of cabinets. It opens as one piece. Hidden depth. Clean lines.
Did you know that modern dishwashers don’t need pre-rinsing? Scraping food bits is enough. The machines are powerful. Pre-rinsing wastes water. It also adds time to your chore. If you batch-load dirty dishes, trigger the rinse cycle first. It prepares the interior without the water waste of a full hand-wash.
Why This Matters
Standard appliances often clash with bespoke kitchens. You end up with a visual interruption in your design flow. Custom integration solves this. It treats the dishwasher not as a machine, but as cabinetry. The result is a cohesive space. Your eye doesn’t snag on the stainless steel front. It glides over the wood.
Tools needed for DIY paneling:
– Jigsaw or circular saw
– Wood glue
– Clamps
– Screws
– Paint or stain to match existing cabinets
Safety first. Disconnect power before removing the front panel. Water lines are nearby. Turn off the valve. Use caution with sharp blades. If you’re unsure, stop. Hire a pro. The cost of a mistake outweighs the savings.
The goal is invisibility. The appliance should function perfectly while looking like part of the wall. Whether you build the panel or order custom doors, the principle is the same. Blend it in. Hide the mechanics. Keep the aesthetic clean.
Some kitchens have odd angles. Irregular spaces. Standard solutions fail there. Custom work fills the voids. It accommodates the quirks. You get a finished look. Not a patched-up one.
What about ventilation? Custom panels can restrict airflow if not designed correctly. Leave gaps. Use slats. Or trust the manufacturer’s specs. Overheating shortens the lifespan of the motor. Don