
Late fall to early winter is essentially “The Decorating Season.” You are likely staring down a tangled string of lights, trying to center a wreath on the front door, or hunting for garlands. Christmas, Hanukkah, Thanksgiving, and New Year’s Eve all demand visual upgrades. These traditions consume time, space, and patience.
But why do these specific items dominate? Why are lights, garlands, and tree ornaments the default choices for your home? The answer lies in history. Here is the first entry in a look at 10 common holiday décor items and their origins.
10. The Origins of Holiday Lights
Holiday lights are the most ubiquitous decoration in modern homes. You see them on eaves, windows, and trees. The story starts with candles. Early Christmas trees were adorned with wax tapers. These posed a fire risk.
In the late 1800s, electrical lighting entered the picture. Thomas Edison demonstrated a string of small electric lights in 1880. He used them for a Christmas tree in his home. This was a safe alternative to open flames.
The shift to electric strings changed how homeowners approached outdoor and indoor decoration. You could now light up a porch without burning down the house. This innovation turned a safety hazard into a staple of home renovation and seasonal setup.
“Electric lights allowed for safer, more complex displays, moving decoration from a fire risk to a neighborhood standard.”
Today, you might be running LED strands along a gutter or wrapping a tree. The technology has evolved, but the goal remains the same. You want visibility. You want tradition. You want your home to look festive without endangering your roofline. The history of holiday lights is a story of safety meeting spectacle.

How to Hang Holiday Wreaths Without Damaging Your Door
Forget the electric candles for a moment. The wreath is the heavy hitter.
It sits right in your face. It’s the first thing people see. But getting it up can turn a festive evening into a carpentry nightmare if you aren’t careful.
Materials you’ll need:
– A sturdy wreath (wooden frames hold up better than wire)
– 3M Command Strips (removable, high-strength) OR a no-drill hook kit
– A level
– A tape measure
– A ladder (if the door is high)
Why You Shouldn’t Just Use Nail Hammers
You might think a single nail is fine. It usually is. But if you’re renting, you’re stuck. If you’re in a historic home, you’re stuck. If you just want to avoid patching drywall or filling holes in wood, skip the hammer.
Nails leave permanent marks. Strips don’t.
Safety warning: Check the weight of your wreath first. Most commercial wreaths weigh between 3 and 10 pounds. If yours is heavier, or if it’s made of dense dried foliage, command strips might fail. For heavy wreaths, use a screw-in hook into the door frame, not the door itself. Hitting the frame stud (if accessible) is best, but standard door frames are often hollow. A heavy-duty adhesive hook is the safer bet for hollow frames.
Step-by-Step Installation
- Clean the surface. Wipe the door with rubbing alcohol. Dust kills adhesion.
- Measure the height. The center of the wreath should align with the center of the door or slightly above the peephole. Use a level to mark this spot with pencil.
- Apply the adhesive. If using strips, press firmly for 30 seconds. Wait 1 hour before hanging anything. Yes, really. Patience saves wreaths.
- Hang the wreath. Hook the loop onto the strip or hook. Check for balance. Adjust if it tilts.
- Check the clearance. Make sure the wreath doesn’t block the doorknob or interfere with the door closing.
Common Mistakes to Avoid
- Hanging it too high. You’ll be looking down at it all month.
- Ignoring the frame. If you drill into a wooden door frame, locate the stud. Without a stud finder, you risk splintering the wood or hitting wiring in older homes.
- Using cheap wire hangers. If the wreath is heavy, the wire loop can tear through the adhesive. Use a metal hook or a thick rope loop.
Wreaths are low-maintenance compared to string lights. No batteries. No tangled wires. Just a bit of adhesive and a little precision.
But here’s the thing: if you’re not comfortable working with adhesives or ladders, consider buying a pre-hung wreath with a built-in metal bracket. It costs a few dollars more, but it saves you the guesswork.
And if you do use nails? Fill the hole with wood filler before you take it down. You’ll thank yourself next year when you want a clean wall again.

The Scent and Symbolism of the Evergreen Wreath
Some folks insist that nothing beats the smell of fresh pine. A holiday wreath isn’t just decoration; it carries centuries of weight. Long before Christmas wreaths hit the mantel, laurel and olive branches signaled victory in ancient Greece. Later, Germanic and Scandinavian pagan cultures lit candles on wreaths, a beacon of hope as they waited for the sun to return after the winter solstice.
Christianity added its own layer. You know the one: the four-candle Advent wreath marking the weeks leading up to the holiday. But faith isn’t the only driver. Simplicity drives the trend. You can build one from evergreen, holly, or even out-of-the-box materials like flowers or holiday candy. That versatility keeps these items a seasonal staple in homes around the world.
8: Garlands
Garlands offer a different kind of flow. Where a wreath holds its shape, a garland drapes. It stretches across a mantel, down a banister, or along a window frame. The construction principles are similar, but the application changes everything.
Why choose a garland over a wreath?
Space and shape. A mantel is wide. A staircase is narrow and vertical. A wreath demands a circular form. A garland adapts. If you have a long stretch of wall or a railing that needs coverage, a garland is the practical answer.
How to make a basic evergreen garland
You need a base. Chicken wire is the standard. Bend it into a loop if you want a wreath, or keep it straight for a garland. Cut it to the length you need, then overlap the ends with a small twist to secure.
Now for the greenery. Pine, fir, or cedar work best. Trim sprigs to about 6 to 8 inches long. Start at one end of the wire base. Twist the stem of the first sprig around the wire. Move down the wire, overlapping each new sprig onto the last one. Keep the tips pointing outward. Work your way down, maintaining a consistent density.
Tools and materials you’ll need
– Chicken wire: 12-gauge is sturdy enough to hold weight without bending awkwardly.
– Pruning shears: Essential for clean cuts on woody stems.
– Pine, fir, or cedar sprigs: Use a mix of lengths for a natural look.
– Twine or zip ties: For securing the ends or attaching the garland to a surface.
– Safety glasses: Wood shavings and pine needles get everywhere. Protect your eyes.
Safety first
Fresh evergreens are flammable. If you plan to add lights, use low-voltage LED strands. Avoid incandescent strings on dry foliage. Keep the garland away from heat sources like fireplaces or radiators. Check the wire base for sharp edges. If the chicken wire pinches your fingers, wrap those spots with electrical tape or ribbon.
The process is repetitive. It’s meditative in a way. You’re building rhythm. One twist, one overlap, one step forward. By the end, you have a length of greenery that feels alive, not just placed. It smells like the outside, even if it’s indoors. That’s
7: Christmas Trees
The holiday wreath has a longer, looser sibling: the garland. Both share a practical origin story. In the deep, dark days of early winter, when autumn’s orange and gold leaves are gone and the world looks grey, evergreen boughs offered one of the few natural ways to bring color inside.
Fresh garlands hit different. The texture is full. The aroma is sharp. The color is rich. They are incredibly versatile. But weaving them is messy, slow work. It is not for the faint of heart.
If your home has long banisters or porch rails, though, the payoff is real. A hand-woven strand holds up against store-bought plastic in a way that is hard to argue with. It feels lived-in. It feels intentional.
For those who prefer the classic silhouette, the Christmas tree remains the anchor. The logic is similar. You are bringing the outside in. You are fighting the season’s blankness with life. Whether it is a bough draped over a railing or a pine standing in the corner, the goal is the same: make the house feel fuller, warmer, and less like a winter waiting room.
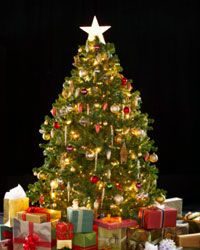
Where the Christmas Tree Tradition Actually Began
You see them everywhere. Rockefeller Center in NYC. The White House lawn. They are the anchor of the holiday season. People decorate them in a million different ways, but where did that obsession start? It is not what most people think.
Academics and religious historians trace the decorated, candle-lit evergreen tree back to Norse celebrations of the winter solstice. That is the shortest day of the year. The décor was meant to hasten the end of winter. Candlelit trees brought hope to the long, dark nights.
The tradition did not stay in the fjords. Roman occupiers assimilated it first. Then early Christians adapted it. They shifted the meaning, eventually leading to the lights and ornaments we know today.
Understanding the Dreidel: More Than a Spinning Toy
Now, let’s talk about the dreidel.
It looks simple. A four-sided top. One letter on each side. But there is more to it than just a party favor for kids. The dreidel is central to Hanukkah. It symbolizes the miracle of the oil.
The letters stand for an acronym of the Hebrew phrase Masmach Nissim Godel. In English, that means “A Great Miracle Happened.”
- Nun (נ)
- Gimmel (ג)
- Hey (ה)
- Shin (ש)
In the Land of Israel, the Shin is replaced with a Pei (פ) because the historical context of the miracle is specific to the diaspora. The Pei stands for “Pareid” (God).
Why spin it? To teach children the story while they play. It is a game, yes. But it is also a teaching tool. The spin keeps the history alive.
Practical DIY: Making Your Own Dreidel at Home
Do you need to buy one? No. You can make a functional dreidel with basic materials.
Materials needed:
– A wooden dowel (1/2 inch diameter, 4 inches long)
– Sandpaper (120 and 220 grit)
– Paint or markers
– A small piece of clay or putty for weighting (optional, for stability)
Tools:
– Chisel or knife (for shaping)
– Awl or nail (for marking)
Step-by-step:
- Shape the top. Cut the dowel. Use sandpaper to taper one end into a cone shape. This is the point that touches the surface. The other end should be flat.
- Create the sides. Use the chisel to carve four flat sides. They do not need to be perfect. A slight irregularity actually helps the spin.
- Mark the letters. Use the awl to lightly mark the center of each face. Paint or write the letters: Nun, Gimmel, Hey, Shin (or Pei).
- Test the balance. Spin it on a hard, flat surface. If it tilts heavily, add a small bit of clay to the base or adjust the weight.
A well-made dreidel should spin for at least 10-15 seconds before stopping.
This is a tactile project. It connects you to the history. You are not just holding a toy. You are

Why the dreidel has four sides and what each letter means
You probably know the tune. “Dreidel, dreidel, dreidel, I made it out of clay.” It’s catchy enough to stick in your head even if you’ve never spun one. But the object itself? That’s where the mystery usually kicks in.
A dreidel is a four-sided top. Each face carries a Hebrew letter. Together, they spell out Purim? No. Geshem? No. It’s Pei, Mem, Shin, and Gimmel. That sequence stands for the phrase pi shur gimmel, which translates to “a great miracle happened here.”
Why the miracle? Because Hanukkah commemorates the rededication of the Second Temple in Jerusalem. The story goes that a single cruse of oil, meant to last only one day, burned for eight. The dreidel is a physical reminder of that event. It’s not just a toy. It’s a historical marker carved into a spinning piece of wood or plastic.
How to play the dreidel game without breaking the bank
The game is simple. Almost deceptively so.
You need a central pot. Fill it with chocolate coins, candy, or any “currency” you want. Players take turns spinning the top. The letter that faces up when it stops determines the outcome.
- Pei (p ) means “nothing.” You get nothing. You lose nothing.
- Mem (m ) means “lose.” You put a coin from your pocket into the pot.
- Shin (sh ) means “win.” You take a coin from the pot.
- Gimmel (g ) means “take all.” You scoop the entire pot. It’s a big win.
The wrong spin can drain your stash fast. A lucky turn leaves you holding a handful of candy and feeling pretty good about yourself. The pot grows and shrinks with every spin. It’s a game of luck, yes, but also a little bit of luck management.
Making your own dreidel from clay or wood
Want to make one? The song says clay, but you can use wood, plastic, or even thick cardboard for a quick version.
If you’re doing it yourself, start with a cone shape. It needs to be balanced. A lopsided top won’t spin true. You’ll get frustrated fast.
- Cut or shape the body. A four-sided pyramid works best.
- Score the faces. Mark where each letter will go.
- Carve or paint the letters. Pei, Mem, Shin, Gimmel. Keep them clear and legible.
- Add a point at the bottom. This is the pivot point. It needs to be sharp and centered.
- Test spin. If it wobbles, reshape the base.
Safety note: If you’re carving wood or clay with a knife or chisel, wear safety glasses. Your eyes aren’t optional.
What makes a dreidel different from other spinning tops
Most spinning tops are two-sided. A dreidel is four-sided. That’s the key difference. The geometry matters. A two-sided top can only land on two faces. A four-sided top has more variables, which makes the game more
Building a Hanukkah Stocking Display
Stockings might feel like a Christmas staple, but they fit right into the Hanukkah mix. The logic is simple. You have eight days of gift-giving. You need a way to hold small presents, gelt, or toys until the moment they’re opened. A wall full of stockings solves the clutter.
Where do you put them?
Hang them on a dedicated rail, a sturdy shelf edge, or even a door frame. If your home lacks a mantel, a simple tension rod between two walls works well. Make sure the hanging point supports the weight. Wet snow, heavy boxes, or dense toy packaging adds up fast. Use a heavy-duty nail or a screw hook. A standard picture hanger will snap.
Materials for DIY Hanukkah Stockings
You don’t need to buy pre-made ones. Most people keep the process low-cost.
- Old sweaters or jackets : Cut the sleeves off. Keep the cuffs for a finished look.
- Canvas fabric : Durable and paintable.
- Felt : Easy to cut, no fraying. Good for decorative shapes.
- Burlap : Rugged look. Needs sealing if it will sit near a humid kitchen.
Tools you’ll need:
– Sharp fabric scissors
– Pins or clips
– Iron-on interfacing (for structure)
– Thread matching your fabric
– Sewing machine or strong needle
Safety note: If you’re cutting thick canvas, wear gloves. The edges get sharp. If you’re sewing, keep fingers clear of the presser foot. Standard sewing machine safety applies.
Sewing the Stockings: A Practical Approach
Start with a template. Trace a stocking shape onto paper. Adjust the size. A 12-inch length works for most hands. Cut two pieces per stocking. Front and back.
Pin the pieces together, right sides facing each other. Leave the top open. That’s where the hanging loop goes.
Step 1: Sew the sides.
Use a straight stitch. Keep the seam allowance at 1/2 inch. This gives you room to turn the fabric right-side out.
Step 2: Create the hanging loop.
Cut a strip of ribbon or fabric, about 12 inches long. Fold it in half. Sew it into the top seam of the stocking. Bury the ends inside the seam so they don’t unravel.
Step 3: Turn and press.
Turn the stocking right-side out. Press the seams flat with an iron. This sets the shape.
Step 4: Add decoration.
This is where it gets fun. Embroider a dreidel. Attach a small bell. Iron-on a star of David. Use fabric paint if you’re not sewing. Paint dries fast, but test a scrap first. Colors can bleed.
Making It Festive: The Eight-Night Connection
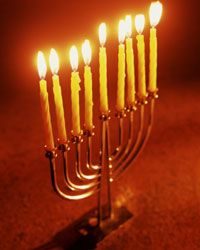
Why stockings for Hanukkah specifically? Because the gifts come out over eight nights. You don’t want a pile of presents in the living room. You want a place to set them. Each night, take one stocking. Open it. Light the next candle on the menorah.
Some families use one stocking per night. Others use one large stocking and rotate the contents. Both work. The goal is ritual and routine

Why Do We Hang Stockings by the Fireplace?
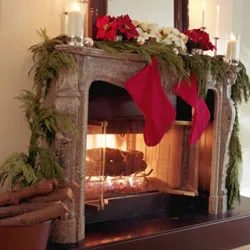
It’s a specific image. You see it in movies, you see it on cards, you see it at the mall. Socks, usually red, dangled over the mantel. Why?
The answer sits in the fourth century. A poor man with three daughters couldn’t afford dowries. He needed cash to keep his girls from being sold into worse fates. So he hung their clean socks by the fire to dry.
St. Nicholas of Myra, the Turkish bishop who later got the “Santa Claus” title, watched this. He snuck into the house at night. He dropped gold coins into each drying sock.
The girls woke up to find their futures secured by a stranger.
Now, you might ask, why socks? Why not a pillow? A basket?
It’s the practical origin. Drying laundry over a fire was common. The socks were already there. The gift went where the fabric was. That’s it. No mysticism required. Just a bishop, three coins, and a convenient heat source.
When you hang a stocking on your chimney today, you’re mimicking that drying spot. You’re waiting for the morning find. It’s a ritual of anticipation. The empty sock becomes a promise.
Does it matter if the gold coins are now candy and small toys? Not really. The mechanism is the same. You set the stage. You wait. You open.
The tradition relies on a specific spatial relationship: the heat source, the drying fabric, and the hidden deposit.
How to Hang Christmas Stockings Without Damaging Your Mantel
If you’re doing this yourself, skip the adhesive strips. They leave residue on painted wood and peel right off during the cold snap.
Use hooks. Small brass or iron hooks work best. Drill a 1/8-inch hole into the top edge of the mantel. Install the hook. Hang the stocking on the loop.
Check your stocking weight. A full stocking filled with heavy gifts can pull down lightweight fabric or break a weak hook.
- Use a sturdy loop at the top of the stocking.
- Space hooks 6 to 8 inches apart if you have multiple stockings.
- Avoid hanging directly over a gas fireplace opening. Heat degrades fabric.
- Keep the stocking bottom at least 12 inches above the hearth.
If you don’t want to drill, use a suction cup hook. They work on smooth, non-porous surfaces. Clean the area first. Press firmly. Test the weight before you hang the real thing.
Why does placement matter? It’s about visibility and safety. If the stocking is too low, sparks or heat will scorch it. If it’s too high, kids can’t reach it, and you lose the interactive element of the morning.
Nativity Scenes: Setting Up the Creche
The nativity scene is older than the stocking. It’s a physical map of the birth story.
Most sets are small. You can buy them in wood, plastic, or resin. The figures are usually Mary, Joseph, the infant Jesus, and a few animals. The stable is the centerpiece.
Where to put it? The mantel is standard. But it’s a small surface. If you have a large set, use a shelf or a table.
Start with the stable.

DIY Nativity Scenes: From Simple Carved Wood to Elaborate Outdoor Displays
Nativity scenes hit a weird spot in holiday décor. You can get by with three stick figures and a cardboard box, or you can go full production value with theatrical lighting and live goats. It’s a spectrum that spans the entire spectrum of your patience and wallet.
The core setup stays the same. You’re building a miniature version of the birth of Christ, the event that anchors the Christmas holiday. The cast is specific. Baby Jesus sits in the manger. Mary and Joseph stand nearby. The Three Wise Men arrive with gifts. Barnyard animals fill the rest of the frame. These characters come straight from the New Testament books of the Bible.
Indoor setups tend to be intimate. You might see simple wooden figures carved by hand. Or you might spot expensive glass miniatures, maybe even pieces made from precious metals. The scale is small. The focus is detail.
Outdoor scenes flip the script.
Plastic statues often guard the front yard. They are durable. They are cheap. They are everywhere. But church entrances offer a different tier. These displays get theatrical lighting. Live characters walk through the scene. Actual animals roam the enclosure. It stops being a decoration and starts being a performance.
The difference isn’t just about size. It’s about intent. The wooden figure on your mantel invites a moment of quiet reflection. The outdoor spectacle demands attention. It wants to be seen from the street.
The complexity of a nativity scene usually mirrors the space it occupies.
You don’t need gold leaf to make it work. You need the right proportions. If you are building a yard display, ensure your figures are large enough to be visible from a car. If you are crafting a table-top piece, focus on facial details and material texture.
Which version fits your home? The answer depends on where you have room. And how much you want to explain to your neighbors.
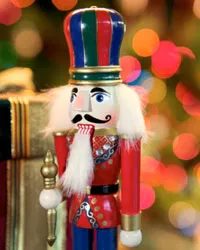
The Nutcracker: From Kitchen Gadget to Christmas Icon
You know that little wooden guy in the corner. The one with the big grin and the chomping jaw. It started as a simple tool. Or maybe an amusing toy, right up until someone stuck a finger in the wrong place. Now? It is a treasured symbol of Christmas celebration. But here is the twist. The connection between this decorative culinary tool and the holiday season is actually fairly recent.
German carpenter Wilhelm Fuchtner made the first toy-soldier-shaped nutcrackers in 1872. That is the origin. But the real shift happened two decades later. In 1892, Tchaikovsky’s famous ballet about a Christmas-present nutcracker that comes to life premiered in St. Petersburg, Russia. Suddenly, the kitchen tool became part of holiday lore.
Why did it stick? The plot centers mostly on the magic of the Christmas holiday. But the nutcracker’s starring role made it a must-have decoration for the season. It is not just a decoration. It is a story. A story with a bite.
DIY: Making Your Own Nutcracker from Gourds and Pumpkins
You do not need to buy a store-bought version. You can make one. Use pumpkins or gourds. These are natural materials that fit the theme. They are cheap. They are seasonal. They are fun to work with.
Here is how to do it.
- Choose your base. Find a medium-sized pumpkin or gourd. It should be firm. No rot. No soft spots. You want something sturdy enough to hold its shape.
- Cut the mouth. Use a sharp knife or a carving tool. Cut a wide, rectangular opening on the front. This is where the “jaw” will go. Make it big enough to fit a walnut or a small nut. Do not make it too deep. You do not want to compromise the structural integrity.
- Create the jaw. Cut a separate piece from the top or side of the gourd. This piece will act as the lower jaw. It needs to hinge.
- Add the hinge. Use a small screw, a nail, or a piece of wire. Drive it through the front of the main body and the jaw piece. Make sure it swivels freely. Test it. It should open and close easily.
- Carve the face. Use a small carving knife or a hobby knife. Carve eyes, a nose, and maybe a mustache. Keep it simple. You are not sculpting a masterpiece. You are making a functional toy.
- Paint it (optional). If you want to make it look more like a toy soldier, paint it. Use acrylic paints. White for the face, red for the hat, blue for the coat. Let it dry completely before use.
Safety first. Carving tools are sharp. Wear cut-resistant gloves. Work on a stable surface. Keep fingers away from the blade. If you are using a power tool, wear safety glasses.
Why This DIY Project Works for Homeowners
This is a low-cost renovation of your holiday decor. You are repurposing food waste or garden produce into a functional item. It

Why gourds are the real stars of fall décor
You might think using pumpkins and gourds for decoration is weird if you’re waiting for Christmas lights. But that’s missing the point entirely. Fall has its own look. It’s not about tinsel; it’s about texture and color.
Natural gourds hit the sweet spot right before the first frost kills the garden. Old farmers knew this. They stored these things in the cellar to eat, but they also saw the shapes. The long necks, the bumpy skins, the weird bulbous bottoms. It was free decoration.
That’s where the autumn palette comes from. You think it’s just “fall vibes” now? It’s because these fruits grow in those exact shades of rust, ochre, and deep brown.
Turning your harvest into dinner (and décor)
Most of what’s growing in your patch right now is actually edible. Don’t just toss it in the compost.
If you’re planning to use them as decoration, you’re losing out on ingredients. You can swap out canned pumpkin for fresh flesh in your favorite recipes. Same goes for summer squash varieties.
How to use them:
– Decor: Pick the ugliest ones. The ones with the crazy shapes and no blemishes. Set them on a mantel or a table runner.
– Food: Roast the edible ones. Add them to soups or bake them into bread.
– Storage: Keep them in a cool, dry place.
“The practice of using them in fall celebrations only makes sense.”
It’s a simple shift in mindset. Stop seeing gourds as just “halloween stuff” and start seeing them as a food source that happens to look great sitting on your kitchen counter.
Do you have a specific recipe in mind for that weird, bumpy gourd you found in the field?