
There is a specific, magnetic pull to the idea of a darkroom. You picture the silence. The smell of fixer. The way time seems to stop under that single, safe red bulb. It’s cinematic. It’s romantic. And honestly, it’s why most of us want in.
But let’s cut the movie script.
Developing color film at home? Forget it. It is chemically volatile, expensive, and frankly, tedious. You cannot even look at color film under a red light because the entire emulsion is sensitive to it. You’re essentially working blind, dropping strips into tubes in pitch blackness until you hope something happened. It’s not magic. It’s just boring chemistry.
Black and white is different.
You have control. You have visibility. And you can do it in a spare closet, a bathroom, or a converted corner of your basement. The barrier to entry is low. The margin for error is higher. And the results are permanent.
Here is how you actually set up a functional space without going bankrupt.
The Space: It Doesn’t Need to Be Pretty
You do not need a dedicated room. You need a space where you can block out all light.
Where to look:
– A closet with a door that closes tight.
– A bathroom with no windows.
– A basement corner that stays dry.
– A large, opaque storage tent.
If light leaks in, your photos are ruined. Period.
Check your seal. Stand inside with the lights off. Close the door. Wait five minutes. If you see any slivers of daylight or streetlamp glow, you have a problem. Seal it with weatherstripping tape or blackout fabric. This is not optional.
The Light Trap: Safety vs. Sensitivity
Color film dies under any white light. Black and white film is less sensitive, but not immune.
You need a safelight. This is a bulb that emits a specific wavelength of light that black and white photographic paper is not sensitive to. Most papers are orthochromatic (sensitive to blue and green, but not red).
- Choose an amber or orange filter (like an Kodak Wratten #2). This is the standard for most home setups.
- Avoid red filters unless you are using special P-5 paper. Standard red safelights can cause “fogging” on modern papers, turning your shadows gray.
- Keep distance. The safelight must be at least four feet away from your work surface. The further it is, the less risk of accidental exposure.
If you can see the safelight too brightly while mixing chemicals, it’s probably too close or the wrong filter.
The Hardware: Trays, Tongs, and Timing
You are not developing film in a dark tube here. You are printing or developing on a flat surface.
Essential Tools:
1. Three Plastic Trays: Large enough to fully immerse your paper or film. Label them: Developer, Stop Bath, Fixer. Do not cross-contaminate.
2. Tongs: Non-stainless steel or plastic. Metal tongs can scratch the emulsion. Buy two pairs—one for developer/stop, one for fixer.
3. **Timers
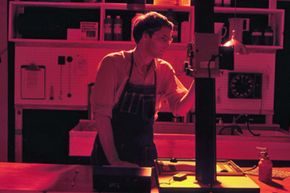
Finding the Right Space for Total Darkness
Start with the obvious requirement: a room that doesn’t let light in. You don’t need a dedicated studio. A bathroom works. A corner of a basement works. A windowless closet? Even better. But if your space has windows, you can fix that.
Black fabric is your best friend here. Layer it. Cover the windows. Tape it around the door edges where light usually sneaks in. How do you know if it’s dark enough? Do the paper test.
Stand in the middle of the room. Hold up a sheet of white paper. Wait five minutes. If you can see any trace of white on that paper, you still have light leaks. Fix them. You need total black for the process to work.
Setting Up Wet and Dry Zones
A sink inside the room is ideal. If that’s not possible, put one as close as you can. You need to split the room into two zones: wet and dry.
This keeps your chemicals off your other gear. The wet side handles the liquid steps. The dry side holds your paper and prints.
Order matters on the wet side. Set up your stations in sequence:
- Developer
- Stop bath
- Fixer
- Wash bath
The drying area goes near the wash bath but away from the chemical splashes. This workflow prevents cross-contamination. It keeps things moving.
Safety First: Ventilation
You are working with harsh chemicals. Fumes build up fast. Good ventilation isn’t optional. It’s a requirement.
Open a window. Use a fan. Make sure air circulates. Don’t breathe in the developer fumes. Protect your lungs. Protect your space.
Essential Darkroom Equipment
Now for the hardware. You need specific tools to turn light into an image.
Enlarger
The heart of the darkroom. It projects the negative image onto the paper. Look for a variable contrast head if you plan to dodge and burn. It gives you control over the image tone.
Timers
You need two. One for the enlarger (countdown). One for the wash (countup). Digital timers are precise. Analog timers are cheap and reliable. Get both.
Trays
Three or four plastic trays. White is best. You can see the chemicals clearer. They need to be flat. No warping. If they warp, the film gets stuck.
Tongs
Two pairs. One for the wet chemicals. One for the dry paper. Never mix them. If you use the wet tongs on dry paper, you ruin the paper. If you use dry tongs in the chemicals, you contaminate the chemicals. Label them.
Safe Light
This is the red or amber light that lets you see without fogging your paper. Not all papers are the same. Red light works for most black and white papers. Amber works for others. Check your paper box. Follow the manufacturer’s advice.
Thermometer
Chemical temperature affects development time. Keep it consistent. 68°F (20°C) is the standard. Use a digital probe thermometer. It’s fast and accurate.
Stopwatch
Or a timer with a countdown function. You need to measure development time precisely. Too short, and the image is faint. Too long,
Skip the pricey commercial units if you are watching the bottom line. Building your own enlarger is entirely possible with online guides. It saves money without sacrificing the ability to blow up negatives into full-sized prints. Just measure your space first.
Essential Dry Room Gear
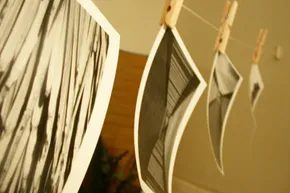
You cannot skip the basics. An easel holds your paper flat. A timer counts the exposure. Photo paper is the canvas. Do not cheap out on the paper itself; grain and contrast depend on the brand.
For the wet side, grab three trays. They must fit the paper size you plan to use most. One for developer. One for stop bath. One for fixer.
Cross-contamination ruins prints. Use a dedicated pair of tongs for each tray. Label them or color-code the handles. Your hands will thank you later when you are pulling prints in the red light.
DIY Worktable and Lighting Solutions
If you lack a proper counter-height table, improvise. A six-foot folding table works. Lift it up on plastic bed risers. Suddenly you have a workspace that keeps chemicals off the floor and your back from hurting.
Lighting is where budgets usually break. Dedicated darkroom safelights are expensive. Photo stores often sell just the red bulbs. They fit standard fixtures. This cuts the cost significantly.
Check the bulb wattage. Too bright and you fog the paper. Too dim and you cannot see. Start low. Test a scrap sheet. Adjust until you can read a label without fear.
Chemicals You Actually Need
You do not need a complex lab. Developer. Fixer. Stop bath. That is the holy trinity.
For stop bath, mix water and white vinegar. It works. It is cheap. It is readily available.
Developer gets used up. It oxidizes. Replace it regularly. Fixer lasts longer but can get tired if you process too many prints without replenishing. Stop bath is a buffer. It keeps the developer from neutralizing too fast.
Keep a log. Note how many prints you have developed in each batch of chemicals. Developer degrades faster than you think. Faded highlights are the first sign you need fresh solution.
“The developer is the only chemical you must replace on a regular basis.”
Safety matters. Ventilate the room. Fixer fumes are nasty. Keep windows open or use a fan. Rubber gloves are non-negotiable. Chemical stains on skin are hard to remove.
Start small. Buy one roll of paper. Process one tray of developer. See how the workflow feels. Adjust tray sizes. Change table height. The setup is yours to tweak.
Next step is exposure testing. But that requires the gear you just bought. Get it set up. Get it organized. Then turn off the main lights.