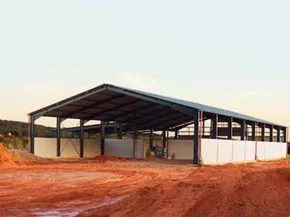
Pole barns are the blue jeans of the construction world. They are durable. They offer decent value. You can dress them up or leave them raw. If you have ever visited a farmers’ market or parked under a carport, you have likely been inside one.
These structures rely on poles set directly into the ground and anchored with concrete. The poles hold up the roof. Walls are optional. A finished floor is optional too. No traditional foundation is required. You can build them to any size. The framing runs horizontally to the posts. This ensures the structure stays sturdy. The posts and frame are wood. You can use metal or wood for the siding. Roofs are usually galvanized steel. Shingles work too.
The features can go anywhere. Add cupolas with weathervanes. Include attics. Put in covered porches. Skylights and windows change the vibe. Dutch doors, barn doors, sliding doors, or overhead doors define the entrance. Rooflines set the style. A gambrel roof screams classic barn. A carriage style roof fits an enclosed run-in stall for horses.
Pole construction is one of the most economical building methods. It is simple from a builder’s perspective. Materials are relatively cheap. You might be wondering what specific materials you need. The list follows.
Checking Regulations First
Before you buy anything, talk to your local building inspector. You need to know if you need a permit. Zoning variances might be necessary. Waivers could apply. Tell the inspector how you plan to use the building. Storage or agricultural uses often face fewer regulations. The inspector may ask for plans. Blueprints help. A property survey ensures you meet setback guidelines. You also need to know how deep to dig the post holes. Get these details sorted before digging.
Essential Materials for Construction
You will need specific items to build this structure. Start with the backbone.
- Poles : Use pressure-treated lumber. Round poles, square posts, or utility poles work.
- Lumber for Framing : You need wood for the roof trusses and girts.
- Trusses : These are triangular, reinforced frames that support the roof.
- Girts : These are horizontal nailing boards nailed to the posts. Siding attaches to the girts.
- Frame : Use 2-by-4s.
- Roof Support : You need purlins and stringers.
- Purlins : Boards nailed across the top of the trusses. They attach the roofing.
- Stringers : Use 2-by-6s. Place these horizontally at the top edge of the poles. They support the roof and trusses.
- Walls : Plywood or steel works well.
- Anchoring : Gravel and concrete to lock the poles in place.
- Roofing : Galvanized corrugated steel sections are standard. Add a roof cap running the length of the roof. Alternatively, use plywood and shingles.
- Fasteners : Straight and screw-in roofing nails.
- Security : Storm clips keep your nails in place.
- Doors : Sliding doors offer a higher opening than overhead doors. Overhead doors need at least a foot of clearance between the door top and the bottom of the truss. Sliding doors are also cheaper.
Tools You Will Need
Grab these tools before starting the build.
- Digging Equipment : A tractor-powered auger, clamshell hand digger, or post-hole digger.
- Hammer : For general assembly.
- Electric Drill : Comes with an attachment for roofing screws.
- Leveling Tools : Carpenter’s level, string level, and line.
- Cutting Tools : Hand saw, miter saw, or circular saw.
- Measuring Tools : Bevel square set.
- Optional : A backhoe can speed up the digging process.
A Note on Telephone Poles
Some people try to use telephone poles as posts. It is possible. They are not all the same size though. It takes time to line them up. Consider the labor involved. You will have to move them. Cut them to length. Maneuver them into the holes. It is messy work. Think twice before taking that route. Standard pressure-treated lumber is easier to handle.
Laying the Foundation and Frame
Start by finding ground that doesn’t fight back. Flat. Graded. Well-drained. You need at least six feet of clearance on every side of your planned footprint, so measure twice before you call the excavator. Decide on your dimensions now. Pole barns usually come in eight-foot increments. You’re looking at widths and lengths ranging from 8 by 8 feet all the way up to 40 by 40 feet. Your intended use dictates the square footage. Storage? Workshop? Livestock shelter? The answer changes the specs.
Mark your corners. Use stakes to center each post hole. Get them exactly 90 degrees. A square structure prevents a crooked nightmare later on. Dig to the depth your local frost line and soil type demand. This is non-negotiable.
Slide the poles into the holes. Check alignment. Check verticality. Brace them tight. If the frame isn’t level and square before the concrete goes in, it won’t be level and square when it’s hard. Pour. Wait. Let it set for several days. Do not rush this.
Once the concrete cures, secure the stringers at the top of the poles. Use a carpenter’s level. Check every joint. Putting up the first truss is the hardest part of the build. It requires muscle, rope, braces, or a backhoe. Do it alone at your peril. Once the first truss is up, brace subsequent trusses against it. They support each other.
Install purlins across the trusses for roof support. If you’re using tin roofing, overlap the panels. Use screw-in roofing nails. Caulk underneath the overlaps to keep water out. Add a roof cap to finish the ridge. Plywood and shingles take longer. They demand precision. Tin is faster but requires careful measurement.
For walls, mount girts all around at ground level. Level them. Nail them to the posts in several rows. You need enough attachment points to secure the siding later. Add plywood or metal sheeting. Cut out openings for windows and doors before you close up the walls.
DIY vs. Contractor Costs
Ellen Franklin learned this the hard way in 1995. A local contractor quoted her $10,000 for a pole barn. She didn’t have that kind of cash lying around. So she drew up her own plans. She grabbed a friend. She rented a backhoe. She did the work.
Her final cost? Less than a third of the quote.
Is it worth the sweat? If you have the time and the tools, yes. If you value your weekends, hire it out. The math is simple.
Insulating Your Pole Barn
Animals don’t care about aesthetics. They care about survival. Cows and chickens need temperature control. Insulation isn’t just for human comfort. It’s for livestock safety. It extends the life of the structure by managing moisture.
Reflective insulation is the standard for pole barns. It reflects heat away from the interior. This is critical once temperatures climb above 60 degrees Fahrenheit. Solar radiation hits the roof and walls. Livestock can’t sweat. They can’t pant effectively enough to cool down. Heat stress kills. It reduces milk production. It lowers fertility. Reflective insulation stops the heat transfer before it hits the animals.
Moisture is the silent enemy. Condensation drips from ceilings. It rots wood. It breeds mold and fungus. Reflective insulation is nonabsorbent. It doesn’t hold water. It blocks the vapor. Anything stored inside stays dry.
There are two main types of reflective insulation. Both feature reflective foil layers on the outside.
- Foil-Foam-Foil: This has a foam core. It is more energy-efficient. It handles extreme temperatures better. Tests show it performs from minus 4 degrees Fahrenheit up to 176 degrees Fahrenheit.
- Foil-Bubble-Foil: This has a polyethylene bubble core. It is lighter. It’s easier to cut with a utility knife. It staples and glues easily.
Both are flexible. Both are strong. You can install them yourself. Just staple or nail them into place.
Which one do you choose? Foil-Foam-Foil adds interior light when used in ceilings. It looks cleaner. Foil-Bubble-Foil has a texture that resembles wrinkled elephant skin. It’s functional but rougher looking.
If you’re still unsure about building from scratch, look into pole barn kits. They provide the materials. You provide the labor. It’s a middle ground between DIY and full contractor help. But the insulation step remains the same. Do it right, or your barn will sweat itself to death.
Skip the lumber yard runs.
If you’ve decided a pole barn is exactly what your property needs, the traditional route of buying every board, nail, and screw individually can be a logistical nightmare. Measuring twice. Cutting once. Then realizing you bought the wrong gauge of steel. It’s exhausting.
There is a cleaner path: a pole barn kit.
These aren’t DIY hacks. They are pre-engineered packages from national and regional suppliers. The deal is straightforward. You pay for the structure. They deliver the materials to your driveway. You provide the tools, the blueprints (or use theirs), and the labor.
Some companies sweeten the pot. You might find in-house financing options. Professional blueprints are often included. Toll-free customer service is standard. If you get stuck, many firms connect you with local construction consultants who know the soil and the codes.
What’s Actually in the Box?
Let’s talk specifics. For a standard wood-framed structure—say, a footprint between 24 by 32 feet and up to 40 by 80 feet, with wall heights ranging from 10 to 12 feet—you aren’t just getting wood.
You are getting a complete structural system.
Typical inclusions in these kits involve:
- Pre-engineered wood trusses that span the width.
- Treated eave and gable posts resistant to rot.
- Treated skirt boards (usually one row) for ground contact protection.
- Wall girts and roof purlins for structural integrity.
- A double top girt truss carrier to hold it all together.
Then there is the exterior. Most kits use Galvalume siding. This is aluminum-zinc alloy coated sheet steel. It’s painted. The roof is painted Galvalume. The trim is painted Galvalume. You’re looking at durability here, not just aesthetics.
Fasteners are included, too. Painted steel sliding screws. Galvanized steel framing nails. You don’t need to hunt for specific corrosion-resistant hardware.
One or two bags of concrete mix per post are standard. You pour the footings. You set the posts. The rest snaps together.
Entry options are usually minimal but functional. One sliding door for the gable end. One 3-foot flush entry door. It’s not a mansion. It’s a barn.
The siding usually comes with a 25-year corrosion-resistant warranty and a 40-year paint warranty. You can pick from a selection of 18 colors. Choose wisely. You’re living with that view for a long time.
The Cost of Doing It Yourself
The price tag for a pole barn kit varies by size. A smaller structure might run you about $5,600. A larger, more robust build could hit $14,200.
Delivery isn’t always free. Unless you live within the company’s specific service area, expect an extra charge for logistics.
Why spend the money and sweat? Because you control the quality. You control the timeline. If a post doesn’t sit right, you adjust it. You don’t wait for a subcontractor.
Skip the Assembly?
Here’s the twist.
You don’t have to lift a hammer if you don’t want to.
For those who have the budget but not the time or physical capacity, you can bypass the kit entirely. Order the entire structure pre-assembled.
This option costs more. It’s not for the tight budget.
Take Kaufold’s Country Sheds and Gazebos on Long Island, New York. They deliver to ten states. They sell a run-in 10-by-40-foot wood horse barn for $8,900. A smaller one-stall wood horse barn goes for $4,000.
The price difference is significant. But so is the convenience. No measuring. No cutting. No worrying if you have the right drill bits.
Which Route Fits Your Garage?
It depends on your tools.
If you have a truck, a level, a concrete mixer, and a weekend to lose, the kit is the smarter financial move. You’re paying for materials, not labor.
If you’d rather spend that weekend watching TV and have the cash to burn, buy the finished structure.
Either way, you’re getting a functional, durable space. The materials are pre-engineered for a reason. They fit. They hold. They last.
For more granular details on insulation or specific architectural quirks, you might need to dig deeper into the manufacturer’s specs. But the core decision is simple.
Build it yourself and save money.
Or buy it built and save time.
The barn doesn’t care which you choose. It just wants to stand up.