You know the sound. That sharp scrape of wood against wood. It happens every time the temperature shifts or the humidity spikes in your home. The door drags on the floor or grates against the frame. It’s annoying. It’s loud. It makes you want to rip the hinges out and hang a curtain instead.
Stop. Don’t touch the drill.
Most homeowners assume fixing a sticking door requires taking it off its hinges. It doesn’t. The problem is rarely structural. It’s usually simple expansion or a minor alignment issue. You can fix a door that won’t close properly in minutes. No disassembly needed. Just a bit of abrasion and some patience.
Here is how to stop the friction and get your door moving again.
Why Does My Door Stick?
Before you start sanding, you need to know what you are fighting. A door doesn’t stick for no reason.
Humidity is the main culprit. Wood is hygroscopic. It absorbs moisture from the air. In the winter, dry air shrinks wood. In the summer, or in damp climates, wood swells. A swelling door needs more space to pass through the frame. Even a few millimeters of expansion can stop the door in its tracks.
Old buildings settle. If you live in an older home or apartment, the frame may have shifted slightly over time. This changes the clearance. The door now hits where it used to glide.
Paint buildup. Have you repainted the door recently? Thick layers of paint add thickness. This is especially true around the edges and bottom. A heavy coat of latex or oil-based paint can raise the door height enough to cause drag.
Check the symptoms. Open and close the door slowly. Listen for the scrape. Look for wear marks. Is it the bottom? The side? The top?
“If the door drags on the floor, the issue is vertical clearance. If it catches on the jamb, it’s a horizontal width issue.”
Tools You Already Have
You don’t need a power planer. You don’t need a contractor’s toolkit. You need simple, manual tools.
Gather these items:
- A sanding block or a flat piece of wood wrapped in medium-grit sandpaper
- A hand plane (specifically a block plane or adjustment plane)
- A pencil or piece of white chalk
- An old t-shirt or drop cloth
- A vacuum cleaner
That’s it. If you don’t have a plane, the sanding block works fine. It just takes a little more elbow grease.
The Step-by-Step Fix
This method works for interior wooden doors. It is not for sliding glass doors or heavy solid-core exterior doors with major structural warping.
1. Mark the contact point.
Use your chalk or pencil. Rub it along the edge or bottom of the door where you suspect friction. Close the door. The marks will transfer to the frame or floor. This tells you exactly where to remove material.
2. Secure the door.
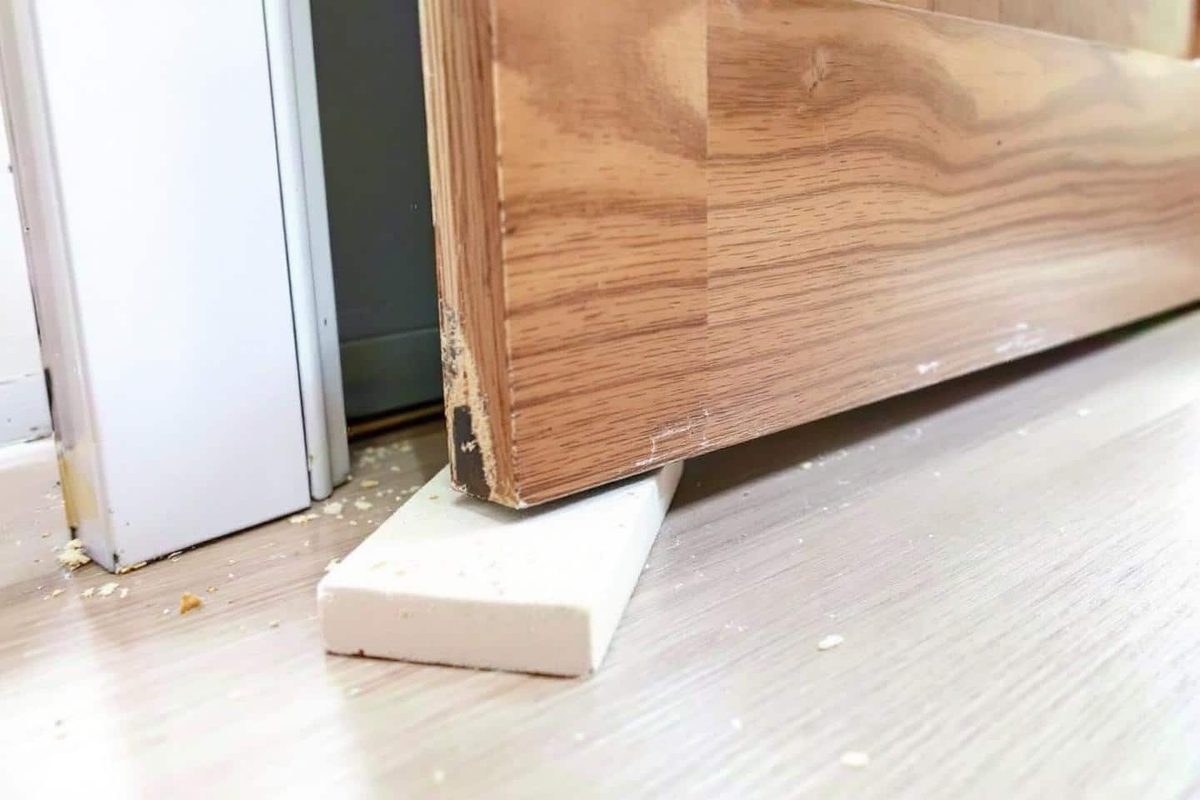
Leave the door on its hinges. Open it about 45 degrees. If the door is heavy, wedge a thick book under it to keep it steady. You don’t want it swinging back while you work.
3. Remove material strategically.
If you are sanding the bottom edge, use your sanding block. Rub back and forth along the grain. Do not sand across the grain. It leaves scratches that show up later.
If you are using a plane, take thin shavings. The goal is to remove hair-thin layers. Stop every few passes. Try the door again.
4. Test frequently.
This is the most important step. Don’t sand too much. It’s easy to go overboard. Open and close the door after every few seconds of sanding. You want it to glide. Not rattle. Just glide.
5. Finish smooth.
Once it clears, switch to finer grit sandpaper. This removes the rough texture. A rough surface catches dust and moisture. It also looks bad.
Protecting the Finish and The Floor
Wood is vulnerable once you cut into it. The protective finish is gone. Moisture will get in.
Wipe down the area with a damp cloth to remove dust. Then, apply a coat of furniture wax or wood oil. This seals the fresh wood. It prevents swelling later on.
Protect your floors while you work. Lay down that old t-shirt or a piece of cardboard. Sawdust scratches vinyl and finishes hardwood. Vacuum the area immediately after you are done.
Preventing Future Sticking
The problem will likely return if you don’t address the environment.
Humidity controls are your best friend. Use a dehumidifier in damp rooms. This keeps the wood stable. In dry climates, a humidifier might help prevent shrinking gaps, though sticking is usually a swelling issue.
Check the hinges. Tighten loose screws. A loose hinge can cause the door to sag. A sagging door drags on the floor. Lubricate the hinges with a dry lubricant or silicone spray. Oil attracts dirt. Dust creates grit. Grit creates noise.
If your door is painted, avoid applying thick coats in the future. Thin layers are easier to manage. Sand between coats.
Sometimes, the fix is simple. Sometimes, the house is just settling. But you don’t need to replace the door. You don’t need to call a carpenter. You just need to take a little bit off.
The door should slide now. Silent. Smooth. If it still catches, check the hinges again. Or perhaps the frame itself has shifted beyond simple abrasion. But for most homeowners, this is all you need to do.
Try it. See how it feels.
There is nothing quite as soul-crushing as hearing that dry scrape. The scritch-scritch of a door dragging against its frame. It happens when you’re late. It happens when you’re carrying groceries. It happens when you just want to close the kitchen door and ignore the argument in the living room.
Stop. Don’t call a carpenter.
The fix is faster than you think. You don’t need to take the door off its hinges. You don’t need to fill the house with drywall dust. You need a rasp, a piece of wood, and about fifteen minutes. Here is how to stop the rubbing without turning your home into a construction zone.
Identify the friction point
Before you cut anything, you need to know exactly where the door is losing. Rubbing is rarely uniform. It’s usually a specific spot.
- The visual check: Close the door slowly. Look for gaps. If the top of the door is tight on one side but loose on the other, you’re looking at a hinge issue or a warped frame. If the middle is tight, it’s likely the strike plate or the wood itself.
- The tape test: This is the most reliable method. Stick a strip of painter’s tape across the door edge and the frame. Close the door. Pull it off. The tape will show you exactly where the two surfaces met. It’s a direct map of the problem.
- Mark the spot: Use a pencil. Dark lines. You need to see this clearly when you start working.
“Don’t guess. Tape reveals the truth.”
Choose your weapon: Rasp vs. Sandpaper
You might be tempted to reach for sandpaper. It’s cleaner. It’s quieter. But for a door that’s genuinely sticking? Sandpaper is too slow. It clogs with the dust and the heat.
For a real fix, you need a wood rasp.
A rasp has coarse teeth. It removes material aggressively. It’s designed for shaping wood, not finishing it. If the door is dragging by more than 1/16th of an inch, sandpaper will take hours. A rasp will take minutes.
If the sticking is minor—a slight drag you can feel but not see—then 120-grit sandpaper wrapped around a block is fine. It’s gentler. It’s less likely to gouge the finish. But for the stubborn cases? Reach for the rasp.
The technique: Shave, don’t hack
You are not trying to make the door smaller. You are trying to make the gap bigger.
- Protect the finish: If your door is painted, you might be okay with a rasp. If it’s stained or varnished, you risk ruining the look. Cover the edges with painter’s tape if you’re worried. Or, accept that you might need to touch up the paint later.
- Direction matters: Rasp from the top down. Or from the outside in. Always pull the tool toward you. Pushing can cause the tool to slip and dig in too deep.
- Check often: This is where people mess up. You take off too much. You end up with a door that slams shut and